User Properties
User properties can only be created by super administrators, who define the data that users can enter during registration. The administrators determine which properties they want from their learners in the LMS, and the user properties are stored in the user profiles accordingly. The user properties also serve to enable automatic group assignments.
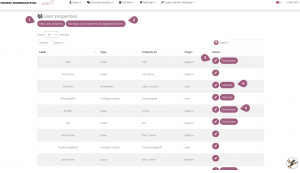
You can add new user properties (1) via Administration > Super-Admin Settings > User properties. You can also determine here the order of the user attributes in the registration form (2). You can edit the attributes you have already created (3). If you activate an attribute that has already been created (4), it will appear in the registration form and can be selected in the assignment conditions. If you deactivate an attribute that has already been created (5), it disappears from the registration form and also from the selection of assignment conditions. If attributes cannot be activated or deactivated, this means that they are selected in the assignment conditions key under Administration > Settings > Configuration.
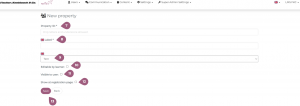
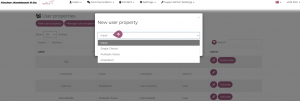
If you want to add a new user property, a pop-up window opens and you can specify the type (6) of the property. You can choose between input, single choice, multiple choice, and dropdown. It is also possible to create a preselection for user properties in the dropdown type.
Once you have selected a type, you can assign an ID (7) to the property. The properties are listed under the ID in the assignment conditions key. Note: If possible, only lowercase letters should be used for this ID.
The label (8) that you specify will appear to users in the registration form. Finally, you can use the drop-down menu to specify the format (9) in which the information should be entered. You can choose between text, number, date, URL, email, and ranges.
You can check the box “Editable by learners” (10) to give them free access to the attributes and allow them to make changes themselves.
The groups of learners can be based on various attributes, among other things, so it is important that learners have limited access to their properties. If an attribute is modified by the learner, they may lose access to the corresponding group.
You can also check a box to specify whether the attribute is visible to the user (11). If this is not activated, this property is not visible to the learner on their own profile. Users can fill in the field for the attribute if you display the attribute on the registration page (12). If you choose to display the attribute, another field will open and you can specify whether this attribute is a required field by checking the box next to “Required for registration.”
The fields to be filled in may vary depending on the type of property.
As a final step, you can save the process (13), and the attribute will then be activated.