Seminars: Participant Management
When managing the participants of a seminar, there are a view things to take into consideration. They are divided into the following categories, as explained in detail below: Seminar Registration and Confirmation.
Note: A seminar is “passed” as soon as a user has successfully participated in one (or more) meeting. A participant does not need to participatein all seminar meetings in order to complete the seminar.
Seminar Registration:
Option 1: Participants register themselves
If a seminar does not have any special settings and is assigned to a group, it is visible to the learners. They can then register themselves for as many of the meetings as they like by clicking on “Enroll” (1).

If the setting “Registration only possible for one meeting” is activated, the learners can only register themselves for one meeting in the seminar. If the setting “Automatic enrollment” is activated, all users of a group will be automatically enrolled in all meetings of the specified seminar as soon as the seminar is assigned to the group. Users will also be automatically enrolled in further meetings that are created. If there is not enough free space available for all users in the group to enroll, the Admin will be notified. More about seminar settings can be found here: Seminars – Settings (coming soon!).
Note: It is not possible to activate both of these settings at the same time.
Option 2: Participants register themselves after receiving approval
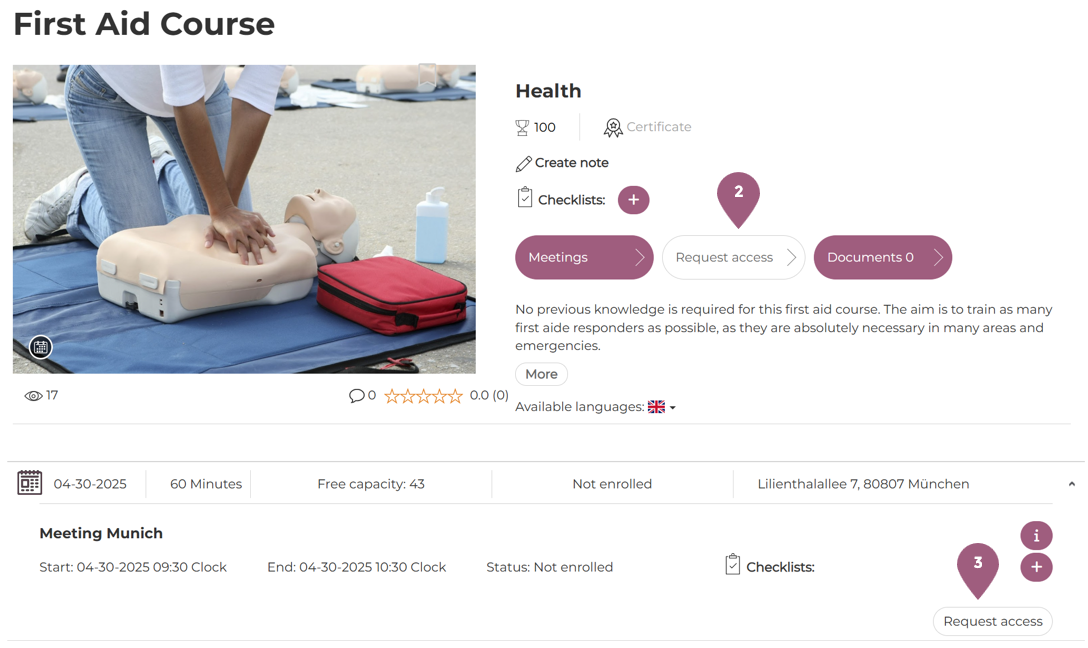
It is possible to require users to receive access or approval before they can enroll in a seminar. This can be activated for seminars (2) with the “Approval Required” setting and for individual meetings (3) with the “Approval for single dates” setting (Administration > Content > Seminars > Settings). In order to require approval for single dates, the setting Approval Required must also be activated. The users will see a “Request access” button instead of the usual “Enroll.”
The approval can be granted by their supervisor or by an administrator. Each user can be assigned a supervisor in their user profile, who will receive a notification for the access request. This can be accepted per email or in the system messages tab under Messages > Approvals. If a learner is manually added to a seminar by an administrator, the user is enrolled without the need to take further steps, despite the fact that access is required. The manual enrollment by an administrator overrides the access request.
Option 3: Participants are registered by an Admin, Tutor or Organizer manually
Admins, tutors, and organizers can also manually add users to seminars. Here is how:
Through the seminar:
- Under Administration > Content > Seminars click on the edit symbol next to the desired seminar.
- Click on the button “Manage meetings”
- Click on the participant button (4)
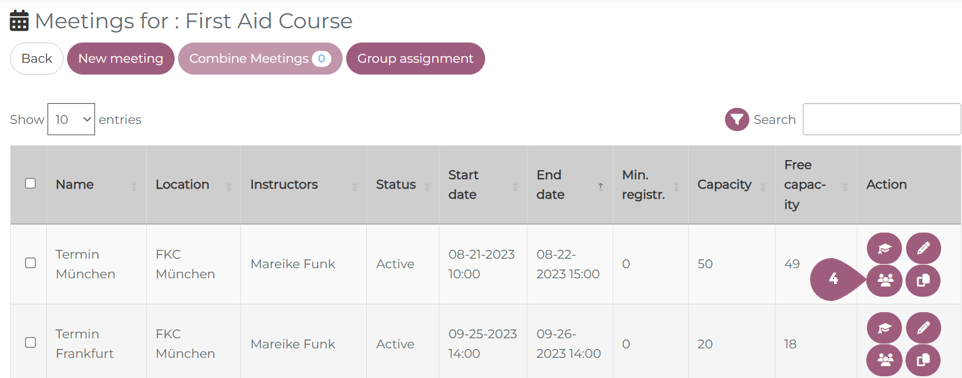
or through the meeting:
- Under Administration > Content > Seminars click on the edit symbol.
- Click on the desired meeting (5)

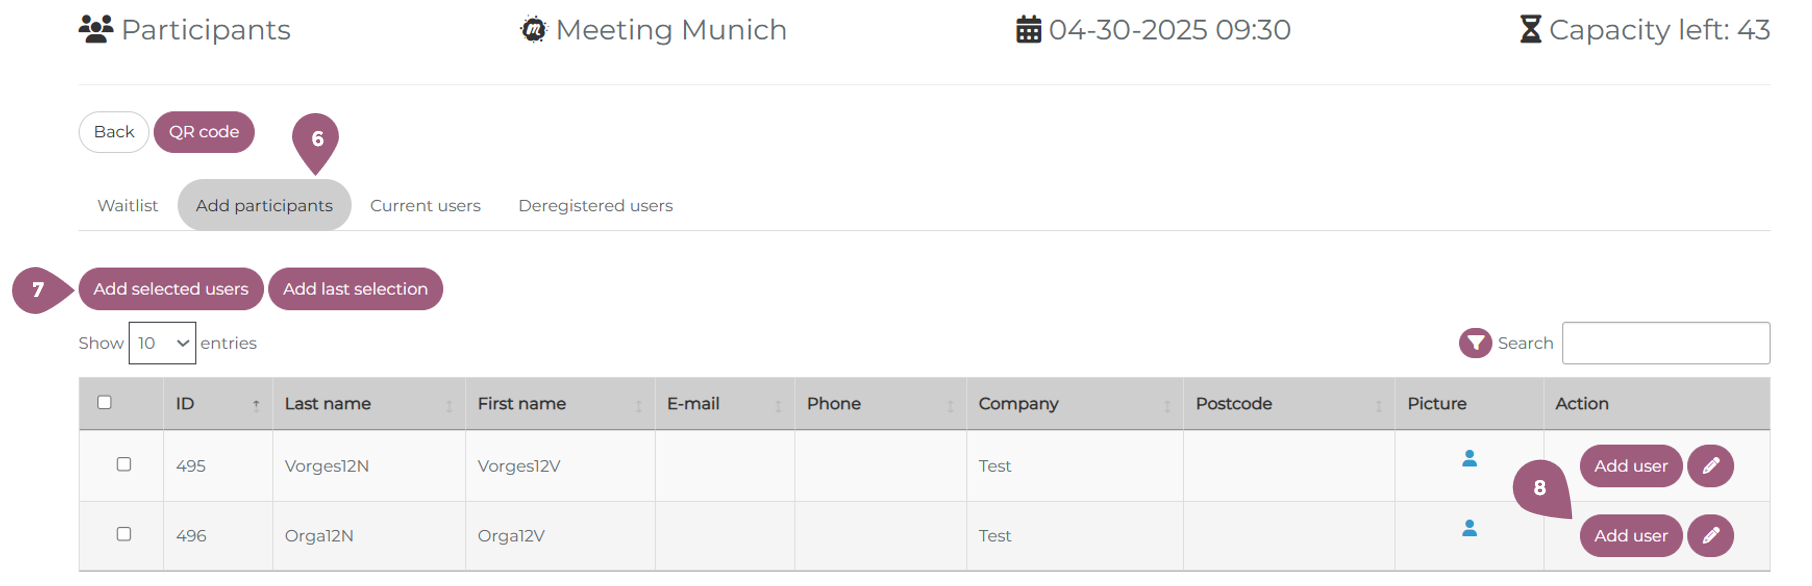
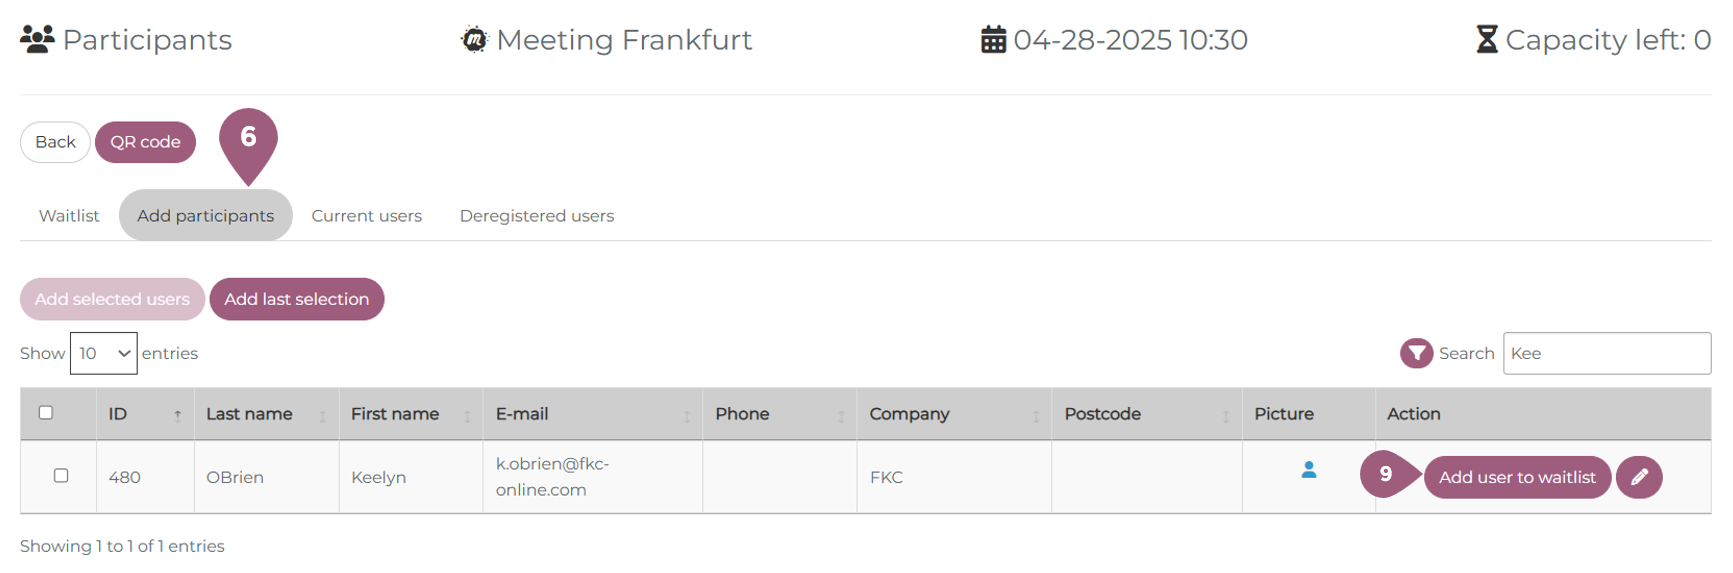
Now, you should see the Participant Overview. You should land on the page “Add Participants.” (6) Here you can either add users individually (“Add users” button (8)) or add a selection of users to the seminar (add selected users (7)). Participants are now registered and receive an automatically generated confirmation message.
Managing Enrolled Participants
Waiting Lists
If the seminar has a limited capacity, the waiting list feature can be activated in seminar settings (Seminar > Edit > Settings > Activate waitlist). The waitlist can be managed from the participant overview (to navigate here see steps 4 and 5 above). When there are no longer free places available, the “Add User” button will become “Add user to waitlist” (9).
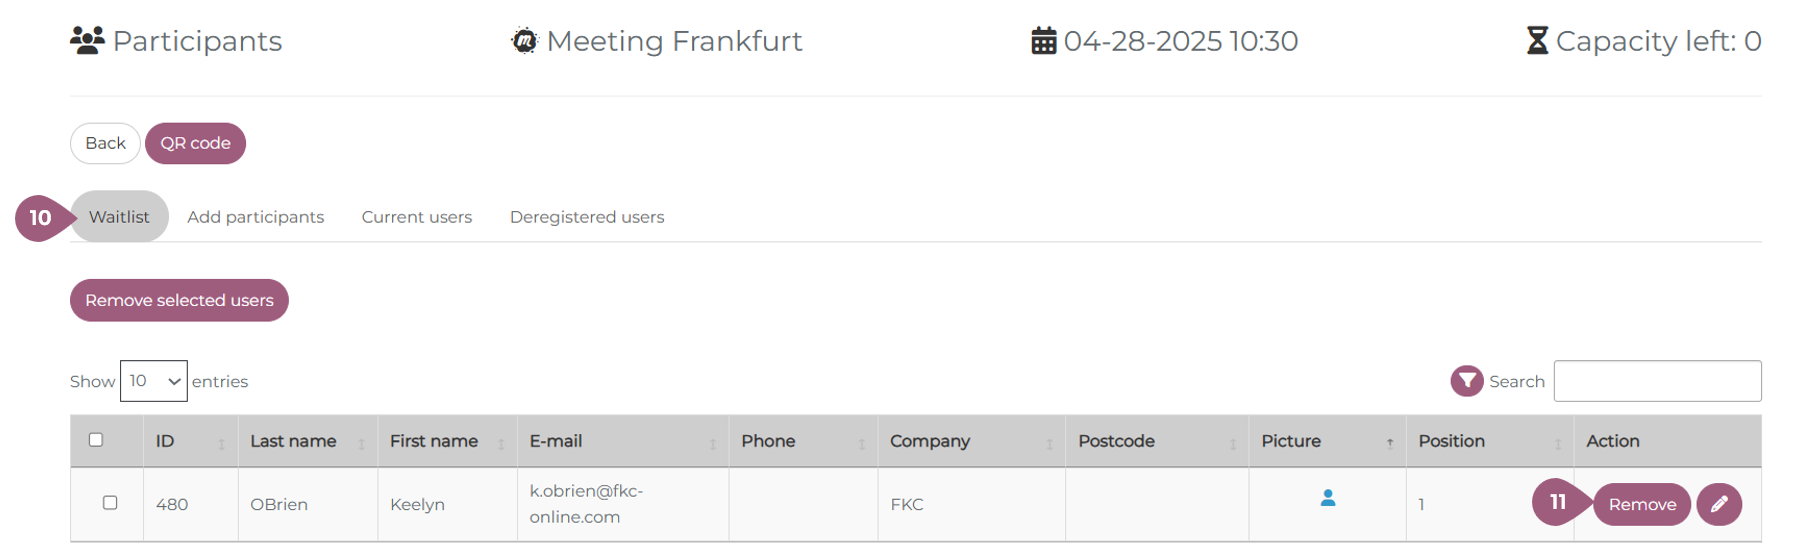
Once clicked, the user will be added to the waitlist, which can be seen under the waitlist tab (10). Users on the waitlist will automatically be enrolled in the seminar in the order they were added to the waiting list. It is not possible to change the order of participants on the waitlist. Should the capacity of the seminar be increased, participants will be automatically added from the waitlist to the seminar until the new capacity is reached. Users can also be removed from the waitlist (11). They can be readded at any time but will lose their position on the list.
If a waiting list is no longer desired, it can be deactivated. However, the seminar meetings cannot contain any waiting lists that have participants on them. Only once the waiting lists are empty (including closed meetings and those in the past) can the waiting list setting be deactivated.
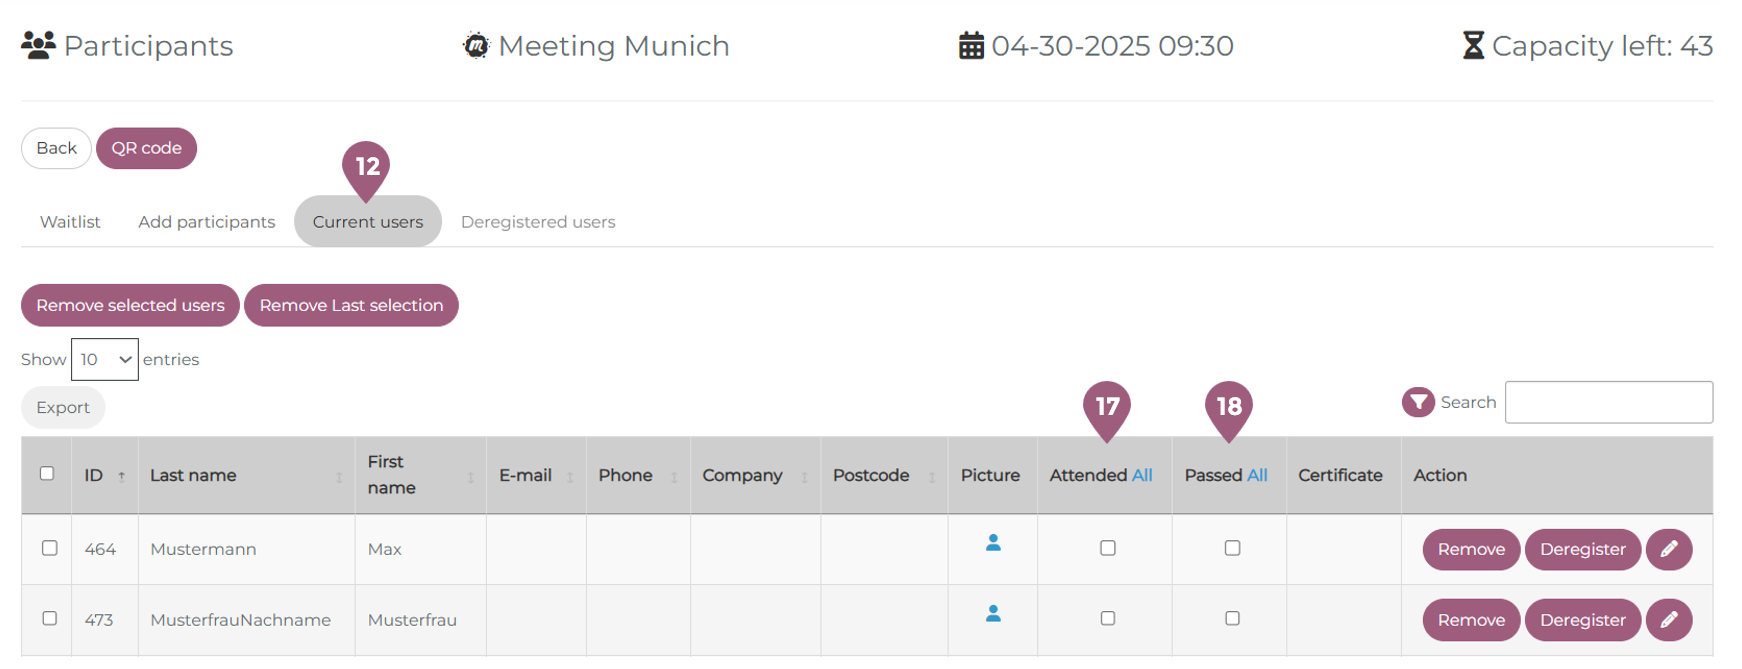
Removing and Deregistering Users
In the current users tab (12), it is possible to see all currently enrolled users in the seminar. From this page, it is possible to remove users (14) from the seminar, in which case they will return to the add “Participants” tab (6) or to deregister users (15), in which case they will appear in the “Deregistered users” tab (13).

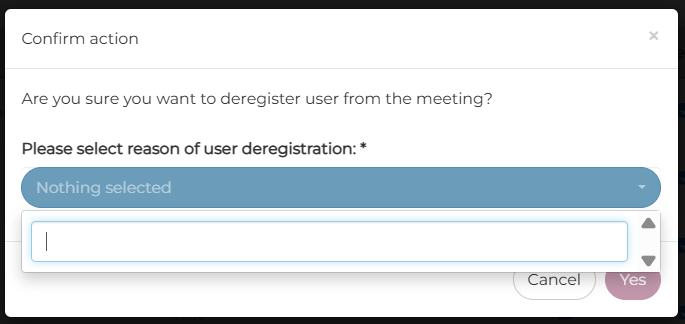
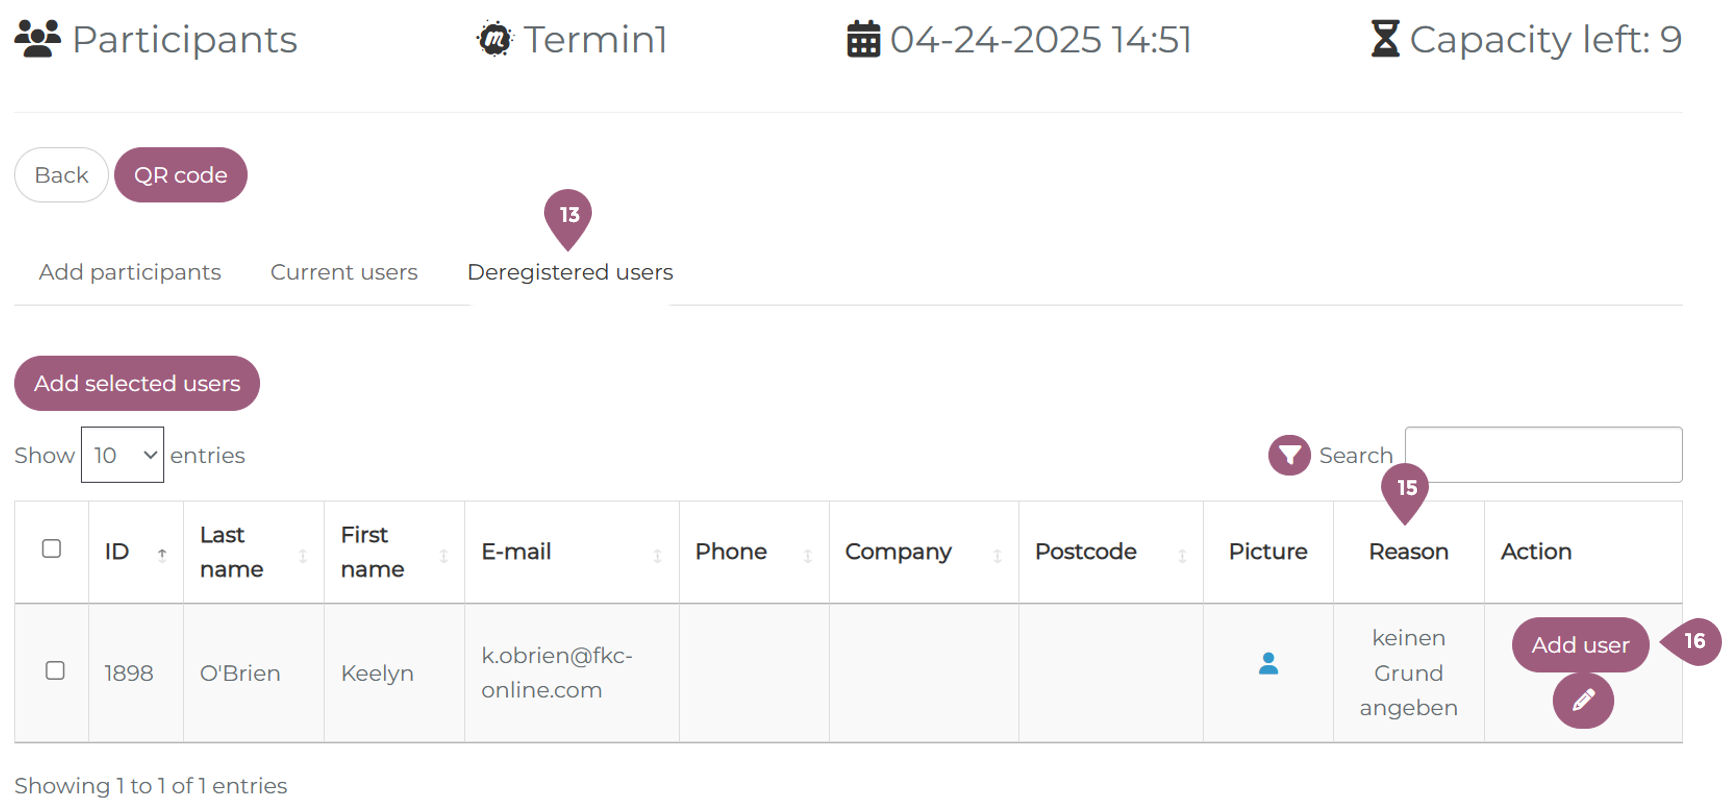
Deregistered users must have a reason for the deregistration, which can be selected from a pre-programmed dropdown menu. The menu can only be edited by Superadministrators under Administration > Super Admin Settings > System Configuration > Reasons of meeting deregistration. The given reasons for deregistering can be found in the Reason column (15) in the deregistered users tab (13).
Once a user is deregistered, they cannot re-register themselves for the meeting. Admins, tutors, and organizers can re-register deregistered users by manually adding them to the meeting participation list. This can be seen in the deregistered users tab (13) in the column action – add user (16). If there is a waiting list and there is no more free space available, the user will be added to the end of the waiting list. If a participant is deregistered by an admin, the user will be marked as “Deregistered by an Organizer” in the Learning History section in the user profile.
Users can also be removed or deregistered after the meeting has taken place. If the meeting has not yet been finalized, it is possible to remove them normally. If it has already been finalized, it must be reopened for participant list to be edited (see below).
Managing Attendance
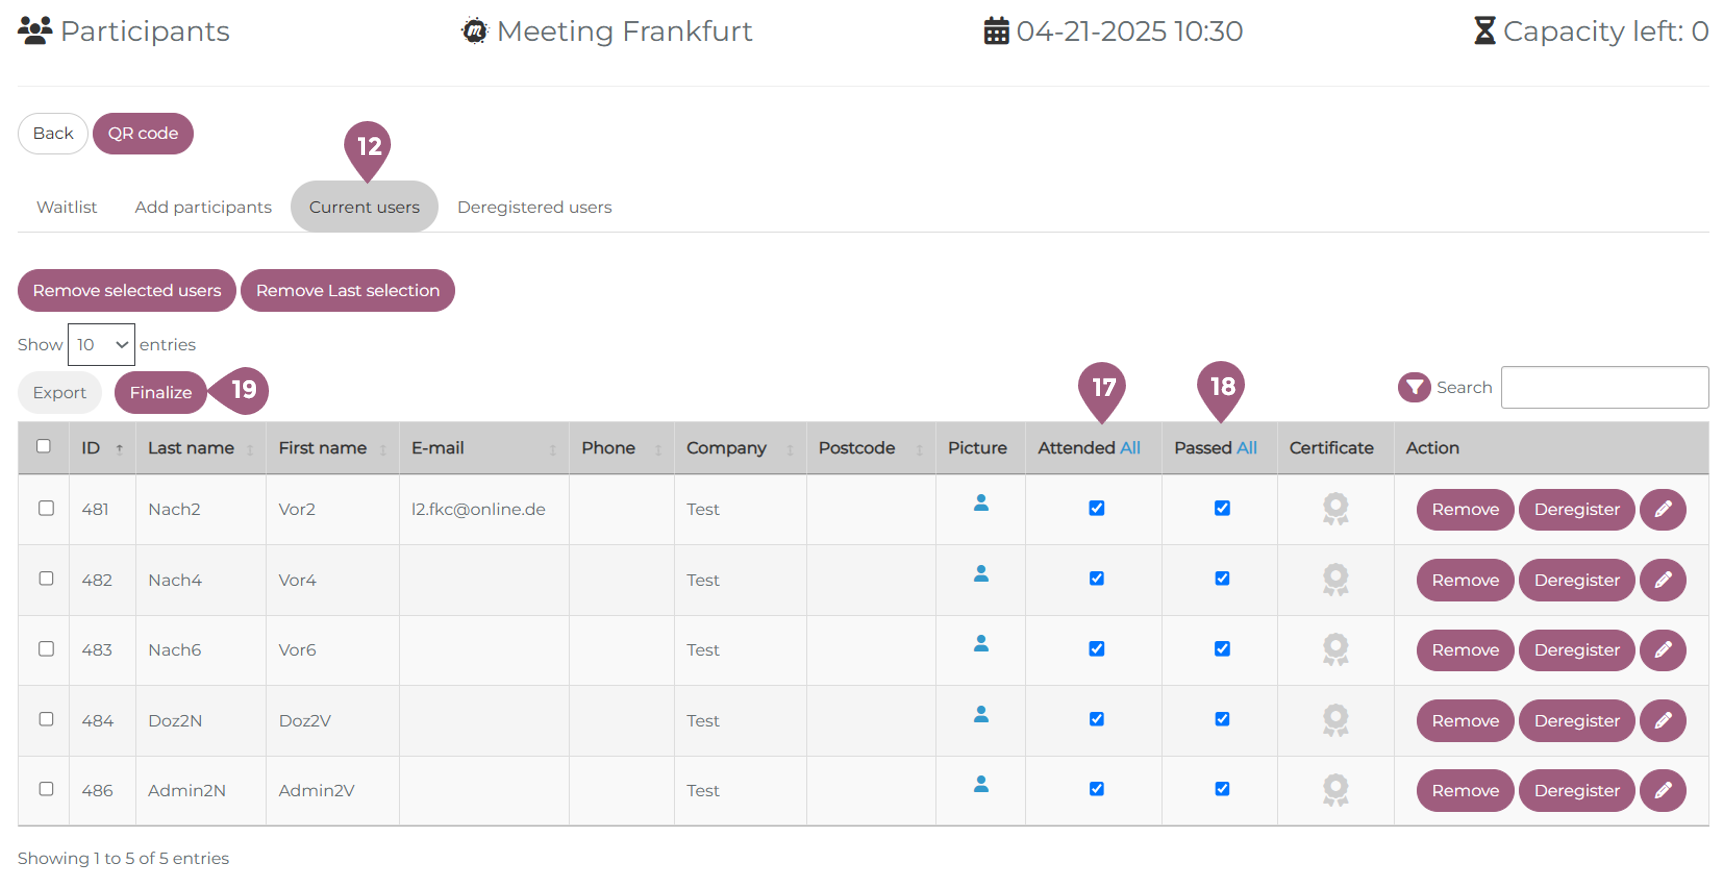
The users’ attendance can be managed before, during, and after the meeting has taken place under the “Current Users” tab (12). User attendance (17) and whether or not they have passed (18) can be recorded by either an instructor or an administrator. In order for a seminar to appear as “complete” for a user, their attendance must be recorded.
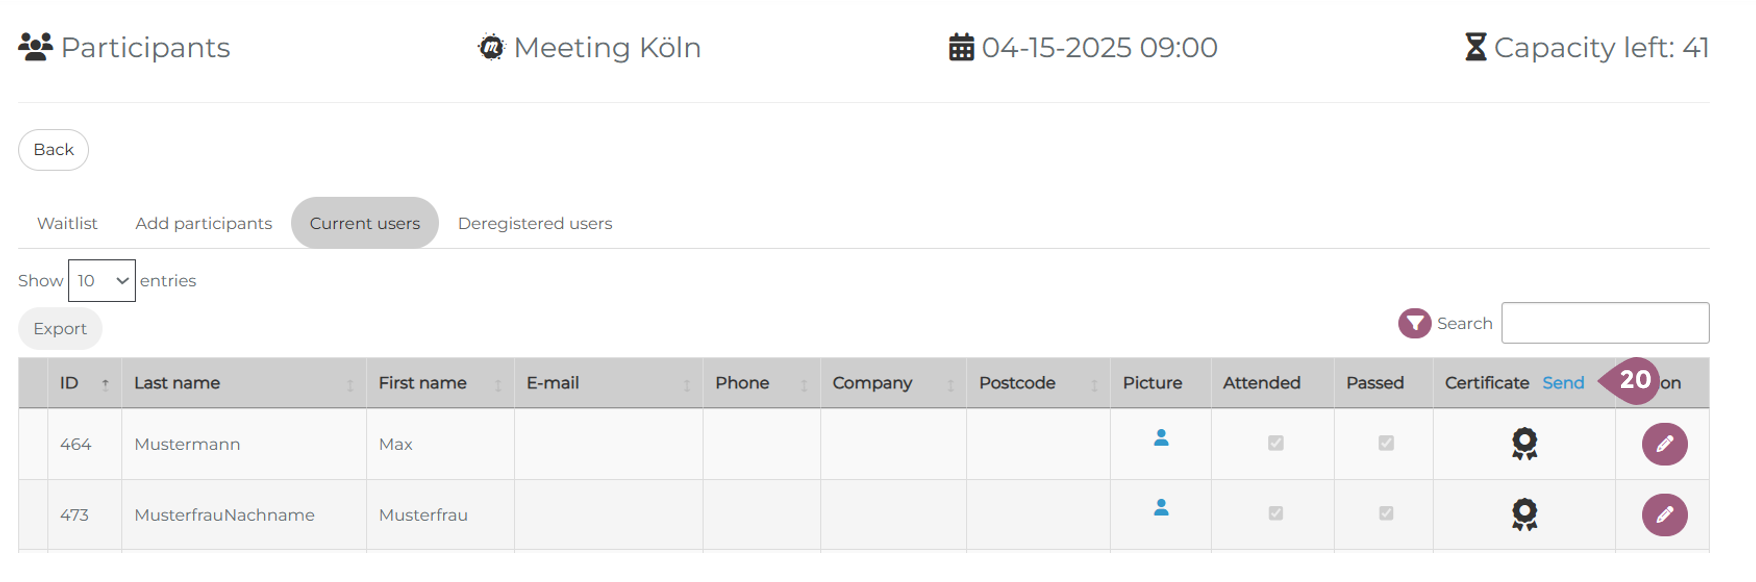
Finalizing a Seminar and Sending a Certificate
Once the meeting has taken place, it is possible to finalize the meeting (19) and send out the certificate (20) in the “Current Users” tab (12). Note that a meeting cannot be closed before it has taken place. Once a meeting has been closed, it cannot be changed. The status of the participants is included in the statistics and learning history as it is at the time of completion. In order for the entire seminar to be recorded as “complete,” the user must have recorded attendance in at least one meeting that has been closed (it is in the past). Closed meetings can be re-opened to edit the attendance record, pass record, or certificate of the participants but only by superadmins.
When a finalized meeting is reopened, it is possible to further edit the participant list of the meeting. New users can be added, but their attendance and passing record must be manually recorded. If not, they remain on the participant list but their status is listed as not attended. If there is a waiting list that still contains participants, a new participant will be automatically added to the meeting after one is removed. Like a newly added user, their attendance must be manually edited.
After a meeting has been closed, the certificate can be downloaded by participants and admins. The certificates can also be sent to the participants via email and system message. This can be done using the “Send” button (20).