Creating a Seminar: General Info
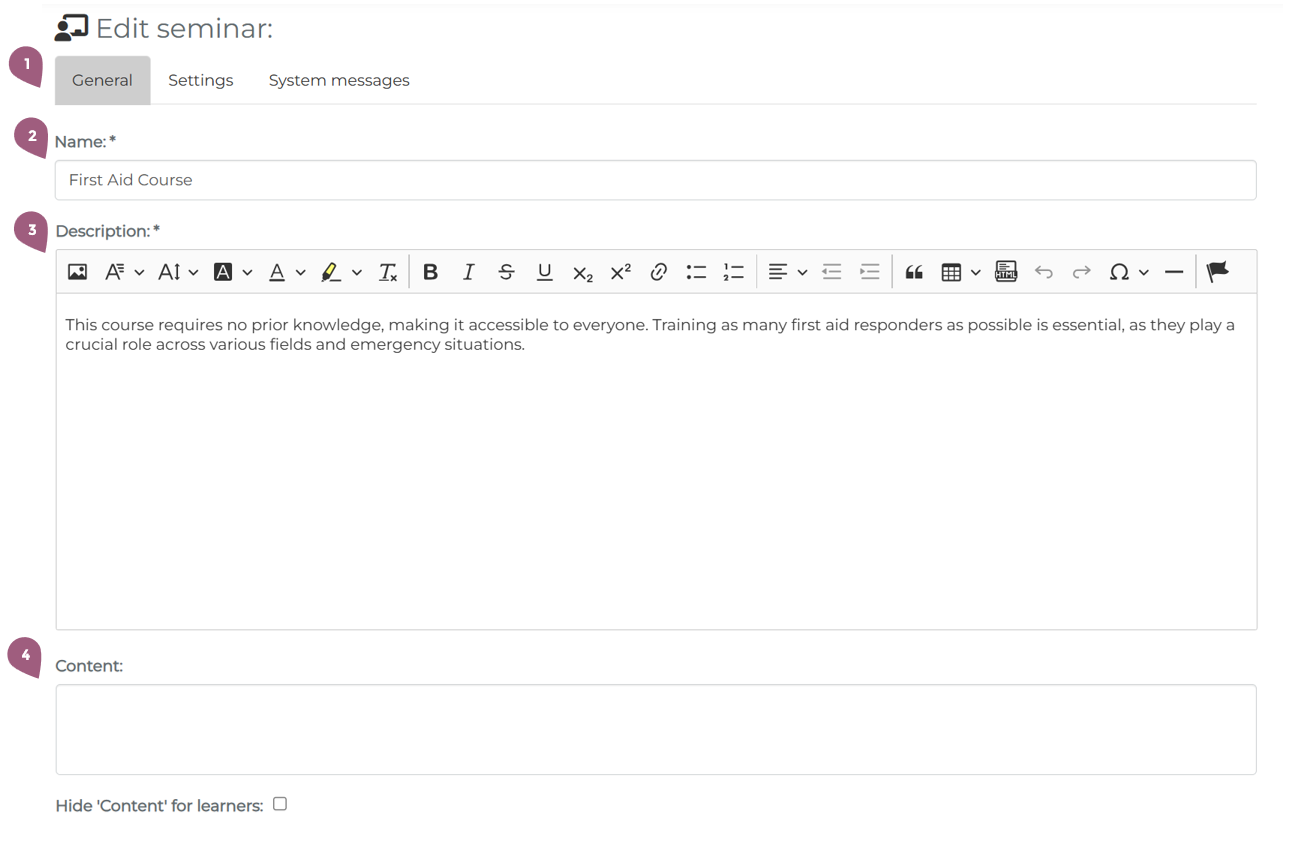
Seminars can be created under Administration > Content > Seminars by clicking on the button “Create a new seminar.” There, you will see the general form for how to create and customize a serminar. There are three tabs along the top: General, Settings, and System messages. This page covers only the options under “General.” For more information about settings, see Creating a seminar: Settings (coming soon) or about system messages, see System messages (coming soon).
In the general settings (1), you must give the seminar a name (2) and a description (3). In the field Content (4), you can write a few optional key words or ideas. If you would like, it is also possible to include the Content on the certificate for the seminar. More information about certificates can be found at: Certificates
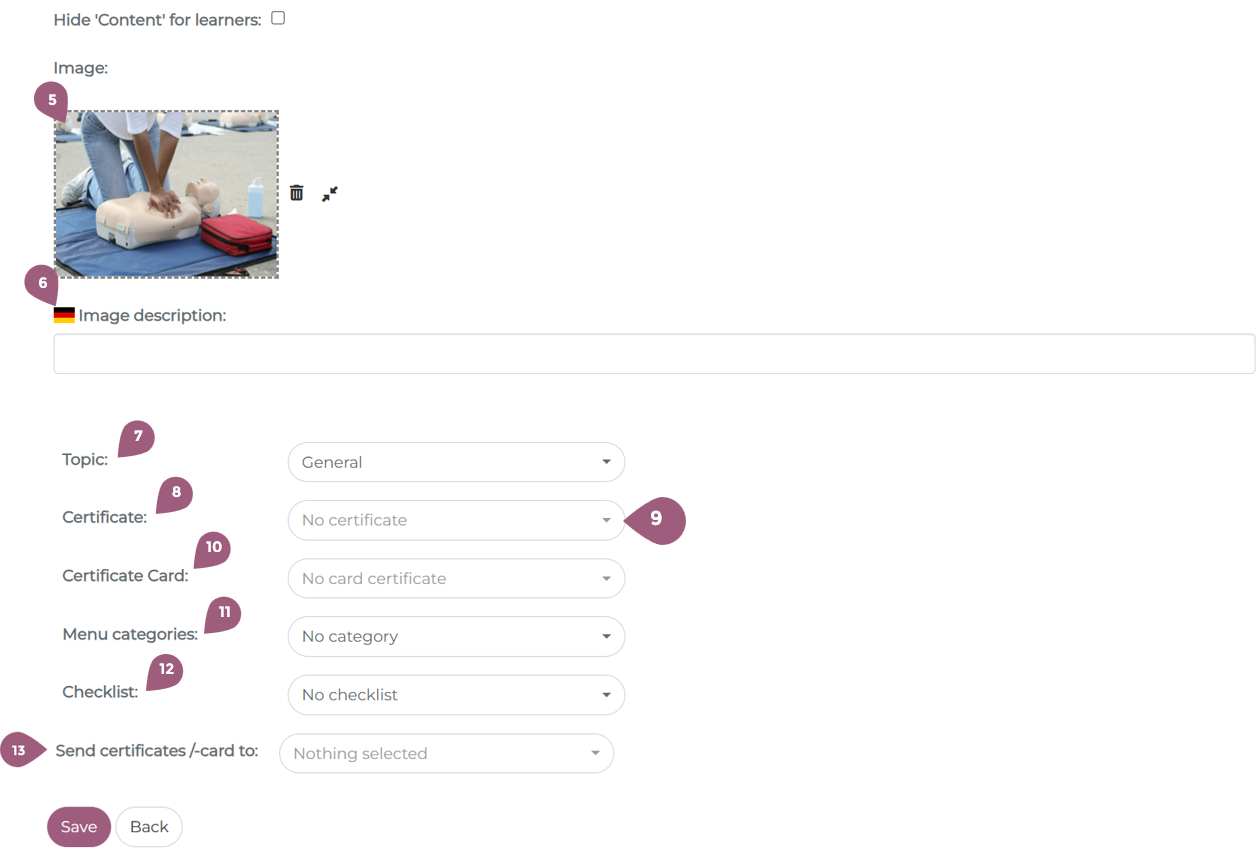
Using the drag and drop, you can also add a cover image (5) for your seminar. If you choose not to upload an image, a standard image from the system will be displayed. It is also possible to add an image description (6) that can be adapted for each language.
Note: The optimal size for a cover image is 650 x 390 px.
If an image with a different aspect ratio is used, the LMS will automatically crop it to fit.
Using the dropdown menu, you can choose which Topic (7) the seminar belongs to. The use of topics is optional.
If you want the the participants to receive a certificate (8) after the completion of the seminar, choose the desired certificate using the dropdown menu (9). For more on certificates, see: Creating a certificate – coming soon! The certificates will be available to the participants after the seminar has been closed. In addition to a certificate, it also possible to send a certificate card (10) to participants. More information on certificate cards is described here: Certificates in card form (coming soon). It is also possible to send the certificates to specific administrators in the LMS (13).
If you would like to add this seminar to a specific Menu category (11), so that it is displayed only in this category, you can use the dropdown menu. You can find further details about categories under Create menu categories – coming soon! The checklist function (12) allows learners and/or admins to attach checklists to the seminar. They are optional. To learn more about checklists see: Checklists (coming soon)