Whiteboard: Overview & Creation
Overview
The nectar LMS offers an integrated whiteboard, which you can find in your Menu Category > Whiteboards. There you can manage your whiteboards or create new ones.
After clicking on the Menu Category – Whiteboards, you land in the following page where you can create new (1) or delete your existing whiteboards (2):
You can export the displayed whiteboards to an Excel, CSV, or PDF document (3) or print and copy them directly. You can adjust the visibility and column order via the “Options” (4).
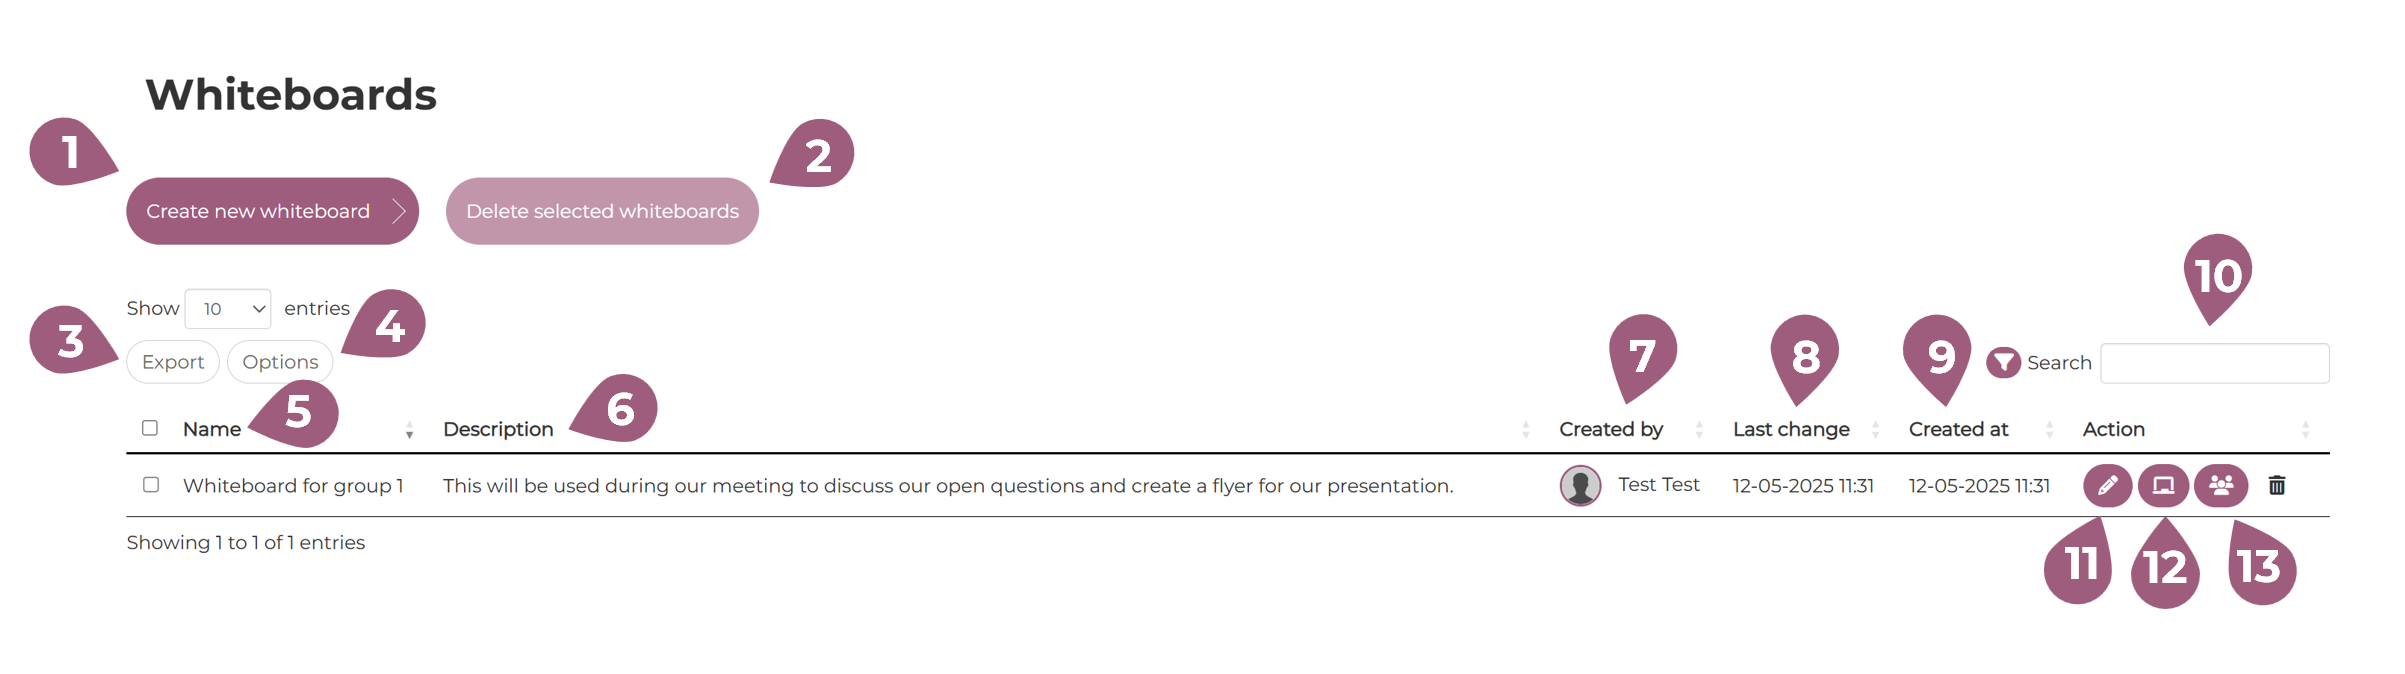
For each whiteboard you can see in the table:
(5) the name
(6) the description
(7) the name of the user that created it
(8) when it was changed
(9) when it was created
You can sort each column alphabetically in ascending or descending order and use the search field (10) to quickly find the items you need.
Under “Action,” you can edit a whiteboard (11), open it (12), and view the participating members (13).
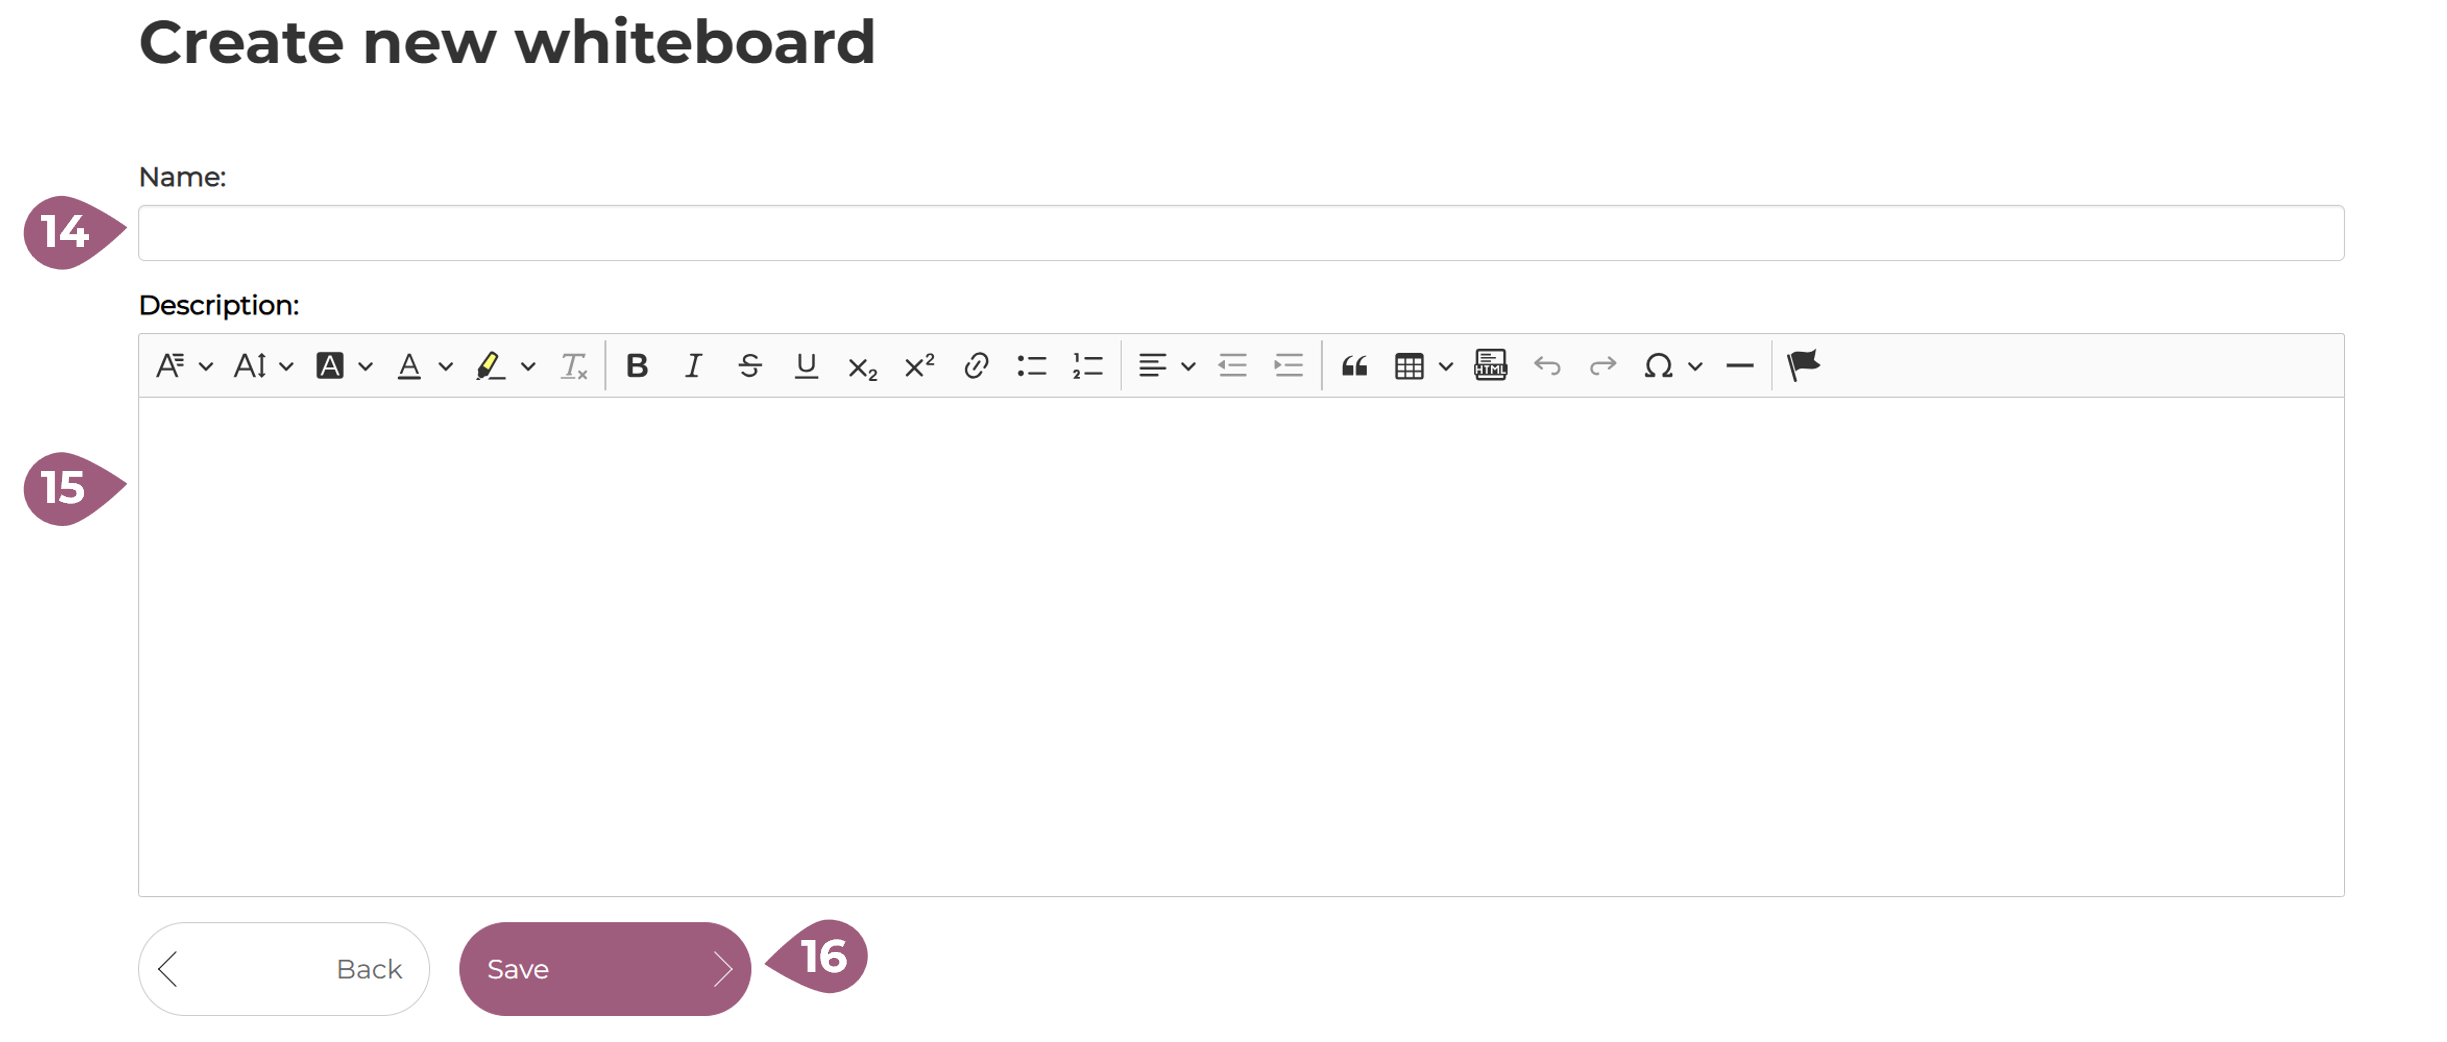
Creation of a new Whiteboard
To create a new whiteboard, you need to fill in the name (14) and description (15) and then click “Save” (16):
Here you can find information on what a whiteboard looks like and detailed information on its use.