Configuration settings
Under Administration > Settings > Configuration, in the “Settings” tab, you will find a list of customizable options.
Each customizable option has a question mark next to it. Hovering your mouse cursor over it will display an explanation of its functionality.
Selecting the checkbox and saving the changes activates the function for the current client.
All functions are explained in detail below:
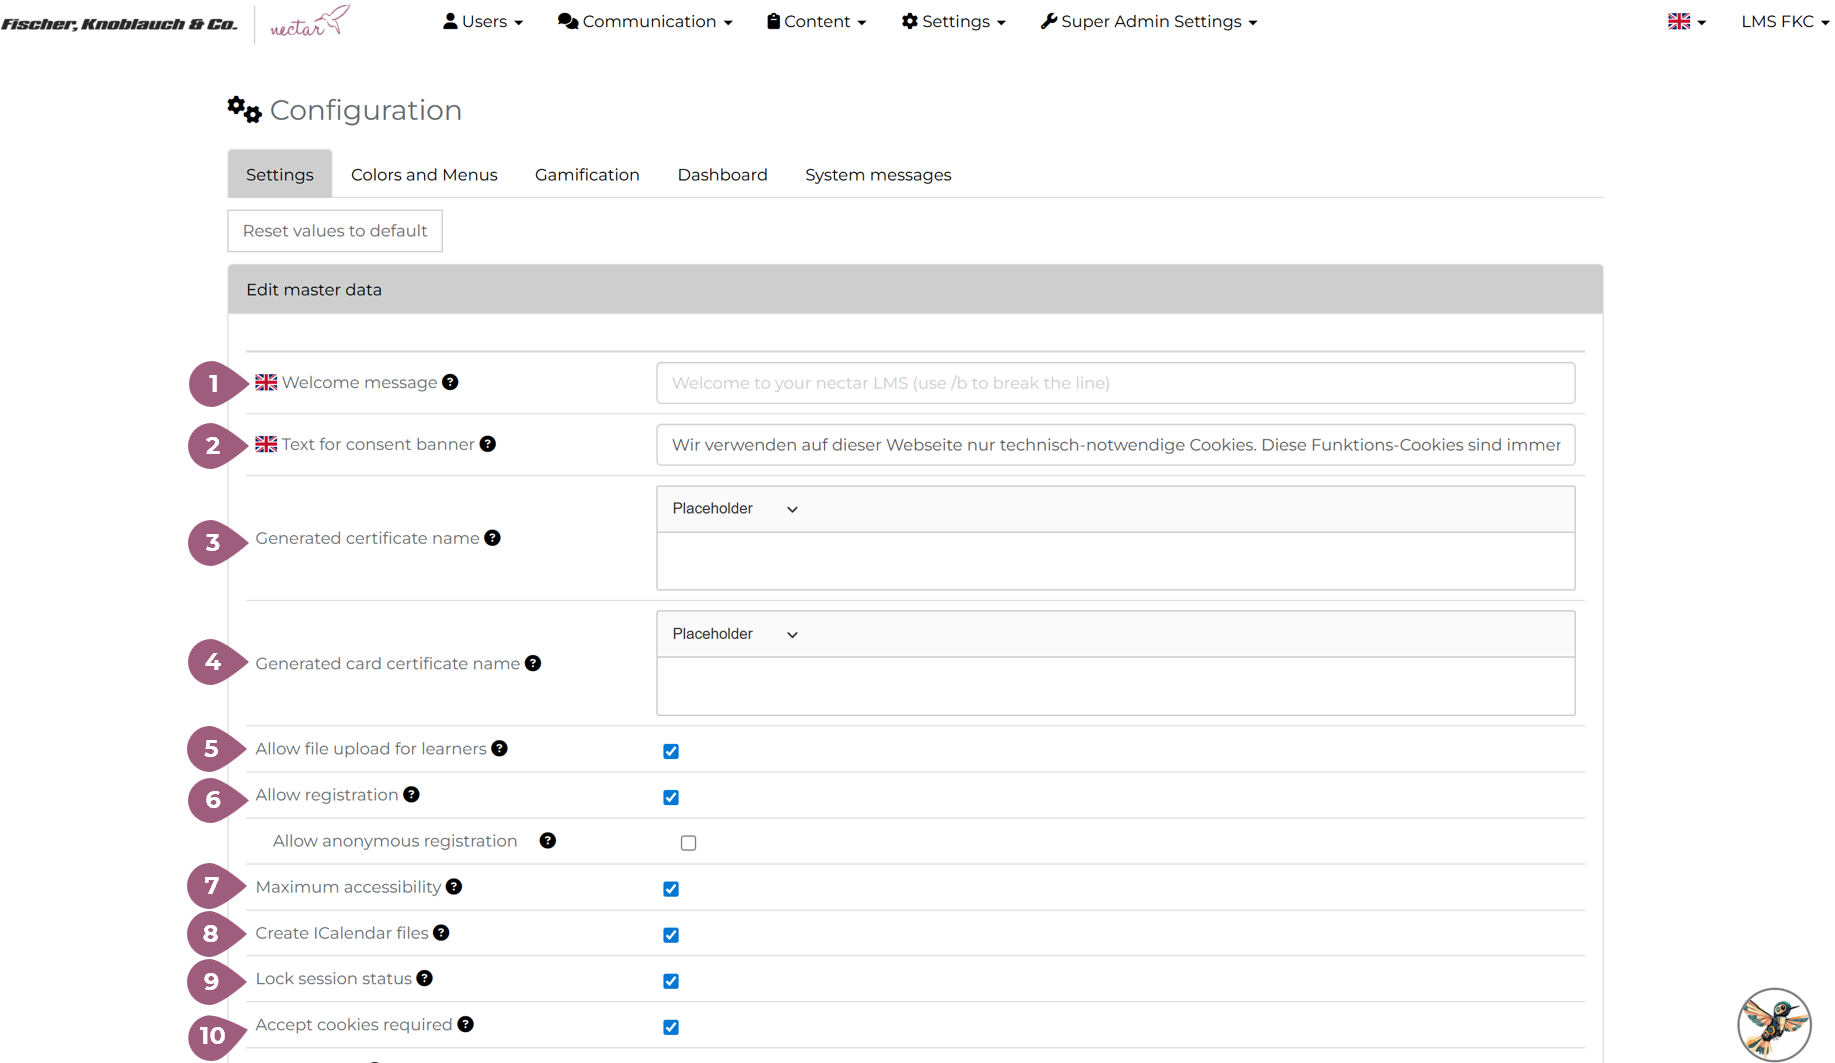
(1) Welcome message: This message will be displayed on the login page above the login form for the current client.
(2) Text for consent banner: Here you can inform users about all cookies, customize them and ask for their consent.
(3) Generated certificate name: Here you can customize the certificate name, which is set as the name of the certificate file for the downloaded certificate.
(4) Generated card certificate name: Here you can customize the card certificate name, which is set as the name of the certificate card for the downloaded card certificate.
(5) Allow file upload for learners: If administrators or super-administrators have enabled the “Allow file upload for learners” setting under Administration > Settings > Configuration > Settings, learners can upload files (e.g., PDF or Office documents) to the LMS. This is then possible for each learning unit via the “Documents” button.
(6) Allow registration: If administrators or super-administrators have enabled the “Allow registration” function under Administration > Settings > Configuration > Settings, users can self-register via the LMS login page. A “Register” button will then appear on the login page, allowing them to create their own account.
- Allow anonymous registration: If this setting is also activated, users will be able to register anonymously in the LMS.
(7) Maximum accessibility: If administrators or super-administrators have enabled the “Maximum accessibility” setting under Administration > Settings > Configuration > Settings, the layout is expanded and supplemented with further hints and explanations.
(8) Create ICalendar files: If administrators or super administrators have enabled the “Create iCalendar files” setting under Administration > Settings > Configuration > Settings, users will receive iCalendar files for appointments or meetings via email immediately after logging in (provided email sending is enabled in your LMS). This allows users to easily import and manage these appointments in their own calendar applications.
(9) Lock session status: If administrators or super-administrators have enabled the “Lock session status” setting under Administration > Settings > Configuration > Settings, learners cannot override the administrator’s decision regarding their session participation. This means the administrator has control over participation, and learners cannot independently change these decisions.
(10) Accept cookies required: If administrators or super administrators have enabled the “Accept cookies required” setting under Administration > Settings > Configuration > Settings, all new users must accept cookies on the login page before they can log in.
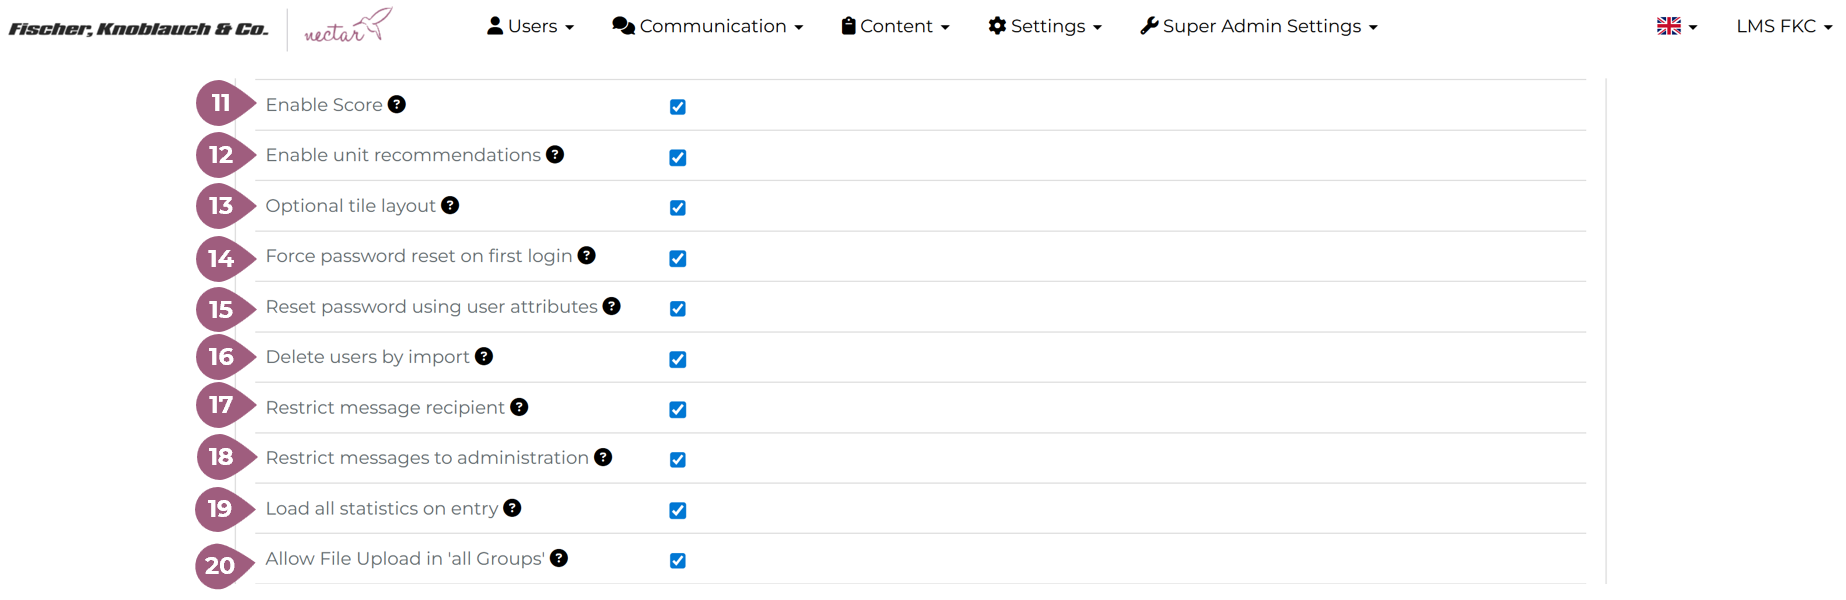
(11) Enable score: If administrators or super-administrators have enabled the “Show points balance” setting under Administration > Settings > Configuration > Settings, learners can view the number of points they have collected on their profile page. Detailed information about gamification in nectar LMS can be found here, and information about gamification points in the user profile can be found here (coming soon!).
(12) Enable unit recommandations: If administrators or super-administrators have enabled the “Enable unit recommendations” setting under Administration > Settings > Configuration > Settings, learners can view further unit recommendations under the heading “Recommended for me” after completing a unit. If you do not want these recommendations to be displayed, please disable this feature.
(13) Optional tile layout: If administrators or super-administrators have enabled the “Optional tile layout” setting under Administration > Settings > Configuration > Settings, administrators can add longer topic names and learners will see a tile layout adapted to long topic names.
(14) Force password reset on first login: If administrators or super-administrators have enabled the “Force password reset on first login” setting under Administration > Settings > Configuration > Settings and have manually created users with a predefined password, they must change their password after their first login to the system.
(15) Reset password using user attributes: If administrators or super-administrators have enabled the “Reset password using user attributes” setting under Administration > Settings > Configuration > Settings, and the users do not have an email address, the system will prompt for one or more user attributes. This allows users without a saved email address in the LMS to reset their password.
(16) Delete users by import: If administrators or super-administrators have enabled the “Remove users by import (default setting)” setting under Administration > Settings > Configuration > Settings, the “Delete unlisted users” option will be selected by default when importing users via CSV. You can still disable this option as needed for each CSV import.
(17) Restrict message recipient: If administrators or super-administrators have enabled the “Restrict message recipients” setting under Administration > Settings > Configuration > Settings, learners can only send a message to administrators or tutors in their group. Otherwise, learners can send a message to all participants in their group.
(18) Restrict messages to administration: If administrators or super-administrators have enabled the “Restrict messages to administrators” setting under Administration > Settings > Configuration > Settings, only administrators can send messages. Learners can only reply to messages from administrators.
(19) Load all statistics on entry: If administrators or super administrators have enabled the “Load all statistics on entry” setting under Administration > Settings > Configuration > Settings, the statistics will be loaded when the Administration > Users > Statistics page loads. Otherwise, the statistics will be loaded after the user clicks the filter button.
(20) Allow File Upload in “all Groups”: If administrators or super-administrators have enabled the “Allow file uploads in ‘All Groups'” setting under Administration > Settings > Configuration > Settings, users can upload documents to the “All Groups” group (under the “Documents” menu category). For this to work, the “Allow file uploads for learners” function must also be enabled.
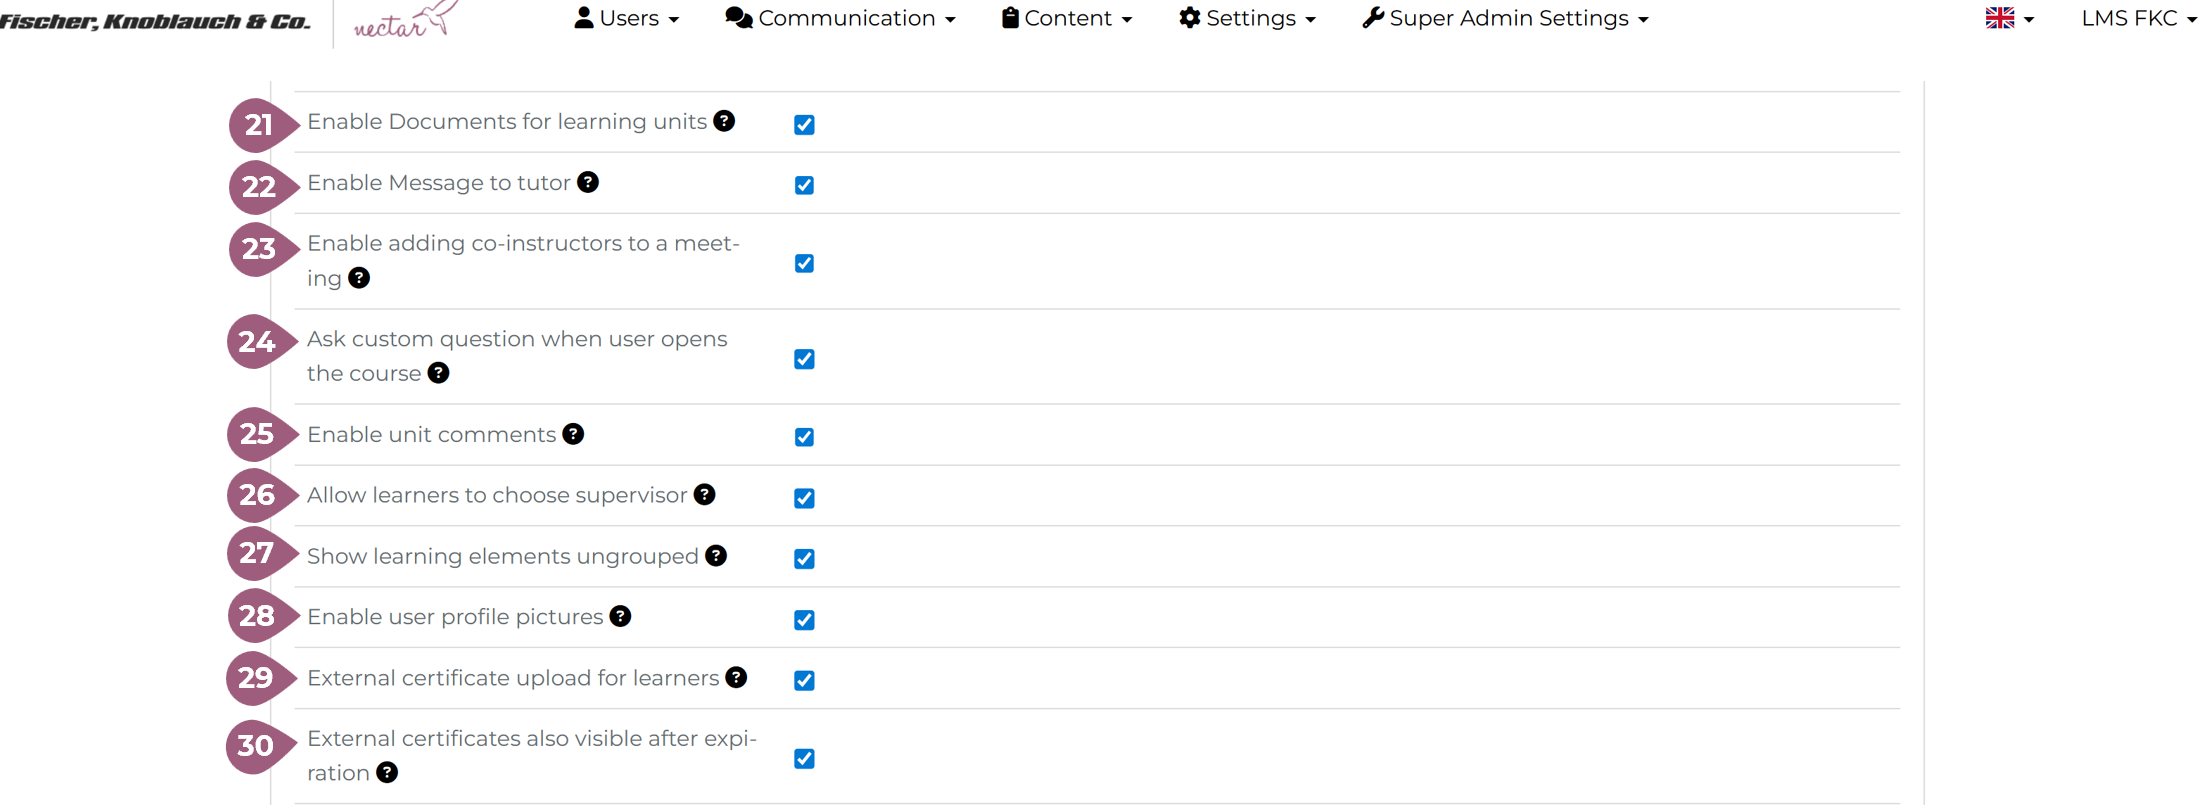
(21) Enable documents for learning units: If administrators or super administrators have enabled the “Enable documents for learning units” setting under Administration > Settings > Configuration > Settings, learners will see the “Documents” button in the course, seminar, training, and course series description and can upload documents there. For this to work, the “Allow file upload for learners” function must also be enabled. Learners can afterwards access the uploaded documents via the menu category “Documents”.
(22) Enable message to tutor: If administrators or super administrators have enabled the “Enable message to tutor” setting under Administration > Settings > Configuration > Settings, learners will see the option to send messages to their current group tutors.
(23) Enable adding co-instructors to a meeting: If administrators or super administrators have enabled the “Enable adding co-instructors to a meeting” setting under Administration > Settings > Configuration > Settings, co-instructors can be added when creating a meeting/appointment.
(24) Ask custom question when user opens the course: If administrators or super administrators have enabled the “Ask a custom question when the user opens the course” setting under Administration > Settings > Configuration > Settings, users must answer the specified question before they can start the course.
(25) Enable unit comments: If administrators or super administrators have enabled the “Enable unit comments” setting under Administration > Settings > Configuration > Settings, users can write comments on learning units.
(26) Allow learners to choose supervisor: If administrators or super administrators have enabled the “Allow learners to choose supervisor” setting under Administration > Settings > Configuration > Settings, learners can select their supervisor in their user profile.
(27) Show learning elements ungrouped: If administrators or super administrators have enabled the “Show learning elements ungrouped” setting under Administration > Settings > Configuration > Settings, all learning elements (courses, seminars, learning boxes, course series, tests, feedback, media, documents) will be displayed ungrouped on the start course page.
(28) Enable user profile pictures: If administrators or super administrators have enabled the “Enable user profile pictures” setting under Administration > Settings > Configuration > Settings, user profile pictures will be visible in the learner area.
(29) External certificate upload for learners: If administrators or super administrators have enabled the “External certificate upload for learners” setting under Administration > Settings > Configuration > Settings, learners can upload their external certificates to their profile in the booking overview and learning history.
(30) External certificates also visible after expiration: If administrators or super-administrators have enabled the setting “External certificates also visible after expiration” under Administration > Settings > Configuration > Settings, expired external certificates are available for download in the users’ learning history.
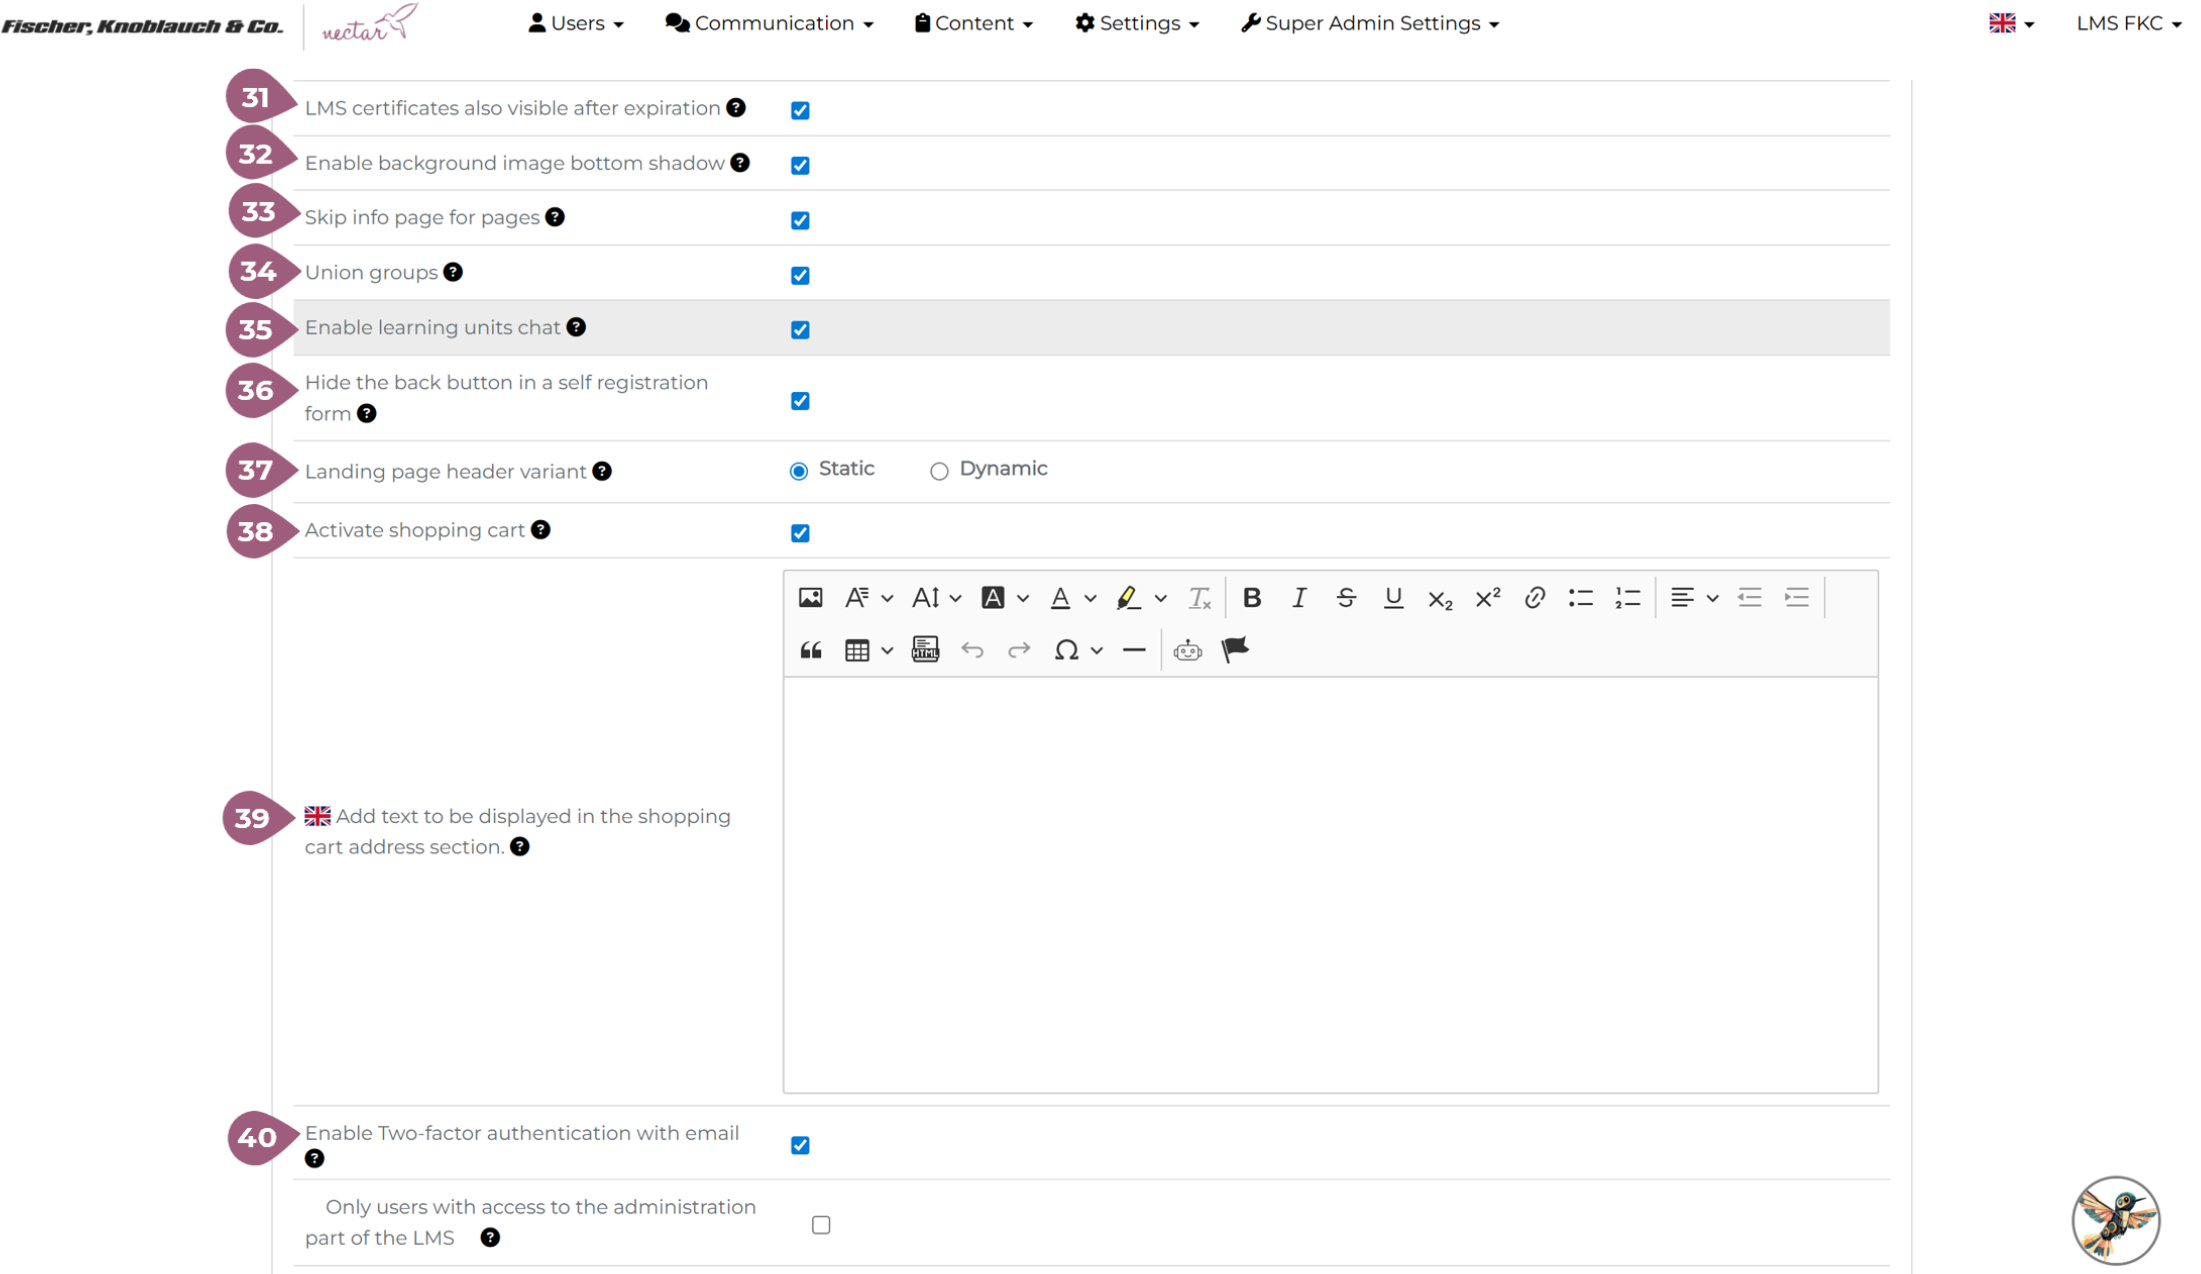
(31) LMS certificates also visible after expiration: If administrators or super-administrators have enabled the setting “LMS certificates also visible after expiration” under Administration > Settings > Configuration > Settings, expired certificates are available for download in the learning history of the respective user profile.
(32) Enable background image bottom shadow: If administrators or super-administrators have enabled the “Enable background image bottom shadow” setting under Administration > Settings > Configuration > Settings, the background image on the homepage will be shaded at the bottom.
(33) Skip info page for pages: If administrators or super administrators have enabled the “Skip info page for pages” setting under Administration > Settings > Configuration > Settings, users will be redirected to the page without having to view the info page (provided that the page does not need to be booked and request approval is enabled).
(34) Union groups: If administrators or super administrators have enabled the “Union groups” setting under Administration > Settings > Configuration > Settings, users will see the menu item across all their groups if they have access through one of their groups.
(35) Enable learning units chat: If administrators or super administrators have enabled the “Enable chat for learning units” setting under Administration > Settings > Configuration > Settings, the chat option for learning units will be available, and the chat menu option will also be available, even if chat is disabled for groups.
(36) Hide the back button in a self-registration form: If administrators or super administrators have enabled the “Hide the back button in a self-registration form” setting under Administration > Settings > Configuration > Settings, the back button will not be displayed in a self-registration form.
(37) Landing page header variant: Administrators or super administrators can choose via the setting “Landing page header variant” under Administration > Settings > Configuration > Settings, if the slider (dynamic header) will be activated in the start course overview page. The Static option displays a single image background, while Dynamic enables the slider. Detailed information about the slider settings will be available here.
(38) Activate shopping chart: If administrators or super administrators have enabled the “Activate shopping cart” setting under Administration > Settings > Configuration > Settings, all purchased items will be saved in the shopping cart, allowing more items to be purchased at once.
(39) Add text to be displayed in the shopping cart address section: If administrators or super administrators have enabled the “Activate shopping cart” and the “Add text to be displayed in the shopping cart address section settings” under Administration > Settings > Configuration > Settings, the text added here will be displayed in the shopping cart address section.
(40) Enable two-factor authentication with email: If administrators or super administrators have enabled the “Enable two-factor authentication with email” setting under Administration > Settings > Configuration > Settings, users will receive an authentication token via email after successful login and must enter this token in the LMS to complete the login process.
- Only users with access to the administration part of the LMS: If administrator or super administrators activate also this setting, only users that have access to the administration area of the LMS, will be required to complete the two-factor authentication with email.
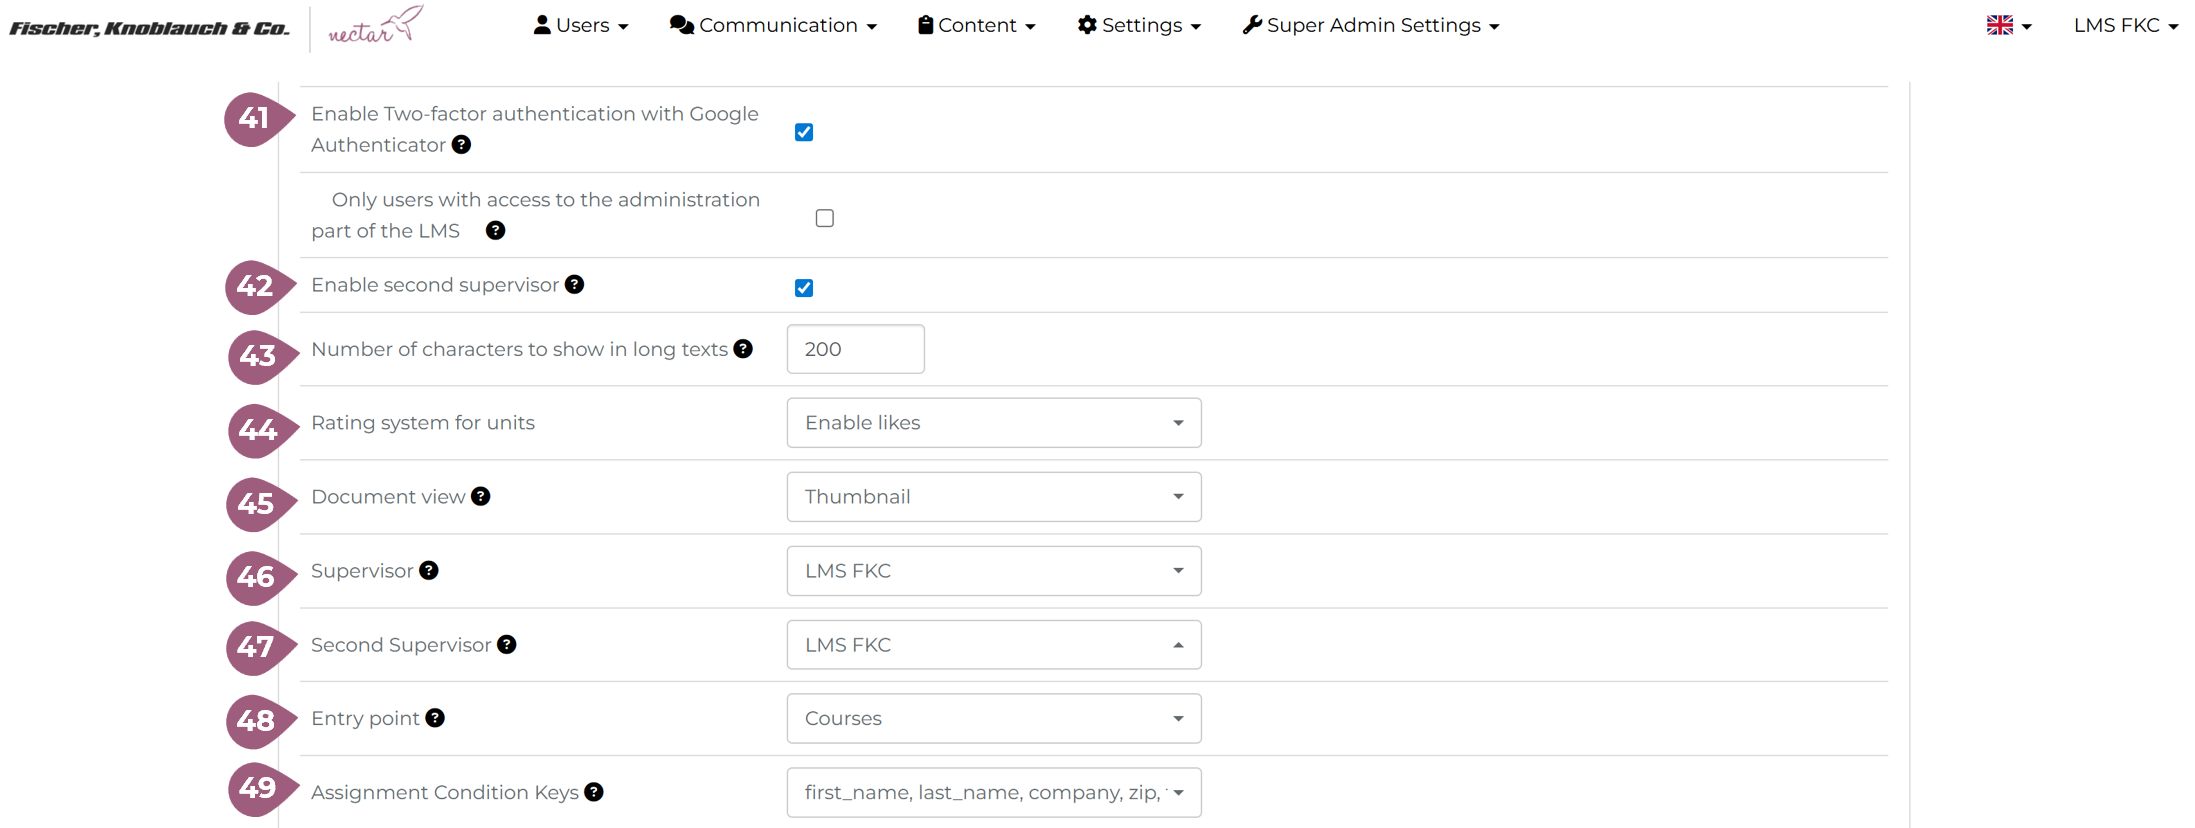
(41) Enabling two-factor authentication with Google Authenticator: If administrators or super administrators have enabled the “Enable two-factor authentication with Google Authenticator” setting under Administration > Settings > Configuration > Settings, users must enter an authentication token generated by the Google Authenticator app in the LMS after successful login to complete the login process.
- Only users with access to the administration part of the LMS: If administrator or super administrators activate also this setting, only users that have access to the administration area of the LMS, will be required to complete the two-factor authentication with Google Authenticator.
(42) Enable second supervisor: If administrators or super administrators have enabled the “Enable the second manager” setting under Administration > Settings > Configuration > Settings, selecting and using a second supervisor is possible.
(43) Number of characters to show in long texts: If administrators or super administrators have enabled the “Number of characters to show in long texts” setting under Administration > Settings > Configuration > Settings, long description values in tables will be limited to this number of characters.
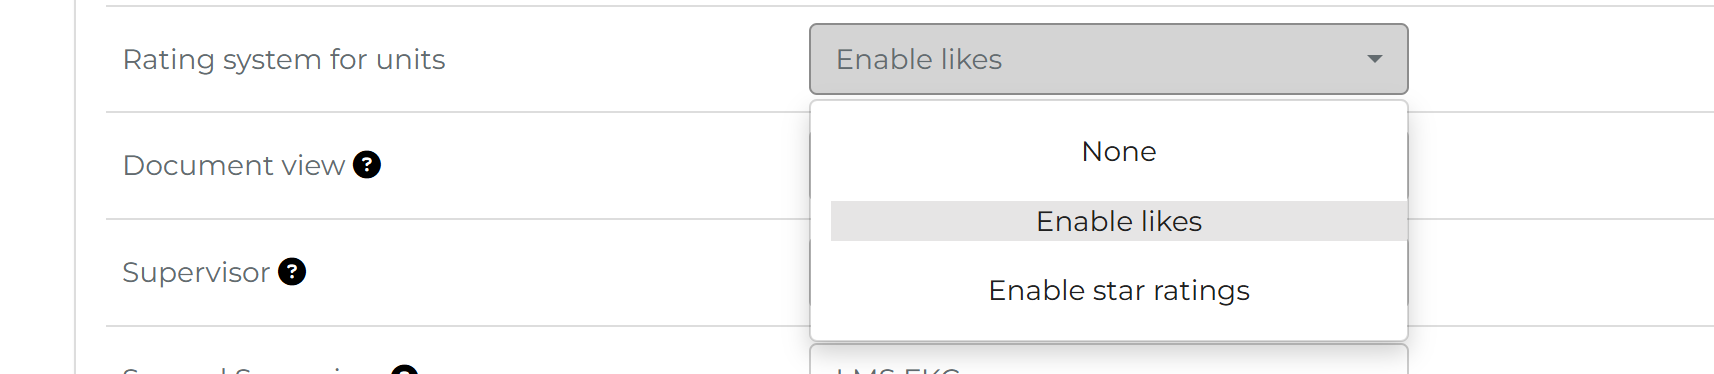
(44) Rating system for units: Administrators or super administrators can adjust unit ratings using the “Rating system for units” setting under Administration > Settings > Configuration > Settings. They can select whether no rating, only likes, or only star ratings should be displayed:
(45) Document View: Administrators or super administrators can define the default document view as thumbnail or table using the “Document View” setting under Administration > Settings > Configuration > Settings. This view is visible to all users via the “Documents” menu item if it is enabled in the group settings.
(46) Supervisor: Administrators or super administrators can define the default supervisor for the current tenant using the “Supervisor” setting under Administration > Settings > Configuration > Settings. This supervisor is selected by the LMS as the default supervisor for all users if no supervisor is specified.
(47) Second Supervisor: Administrators or super administrators can define the default second supervisor for the current tenant using the “Second Supervisor” setting under Administration > Settings > Configuration > Settings, if the second supervisor setting is enabled (42). This supervisor is selected by the LMS as the default second supervisor for all users if no supervisor is specified.
(48) Entry Point: Administrators or super administrators can use the “Entry Point” setting under Administration > Settings > Configuration > Settings to specify which page should open after users login.
(49) Assignment Conditions Keys: Administrators or super administrators can use the “Assignment Conditions Keys” setting under Administration > Settings > Configuration > Settings to specify which keys should be allowed for creating automatic group assignments. Only the user properties you have selected here:
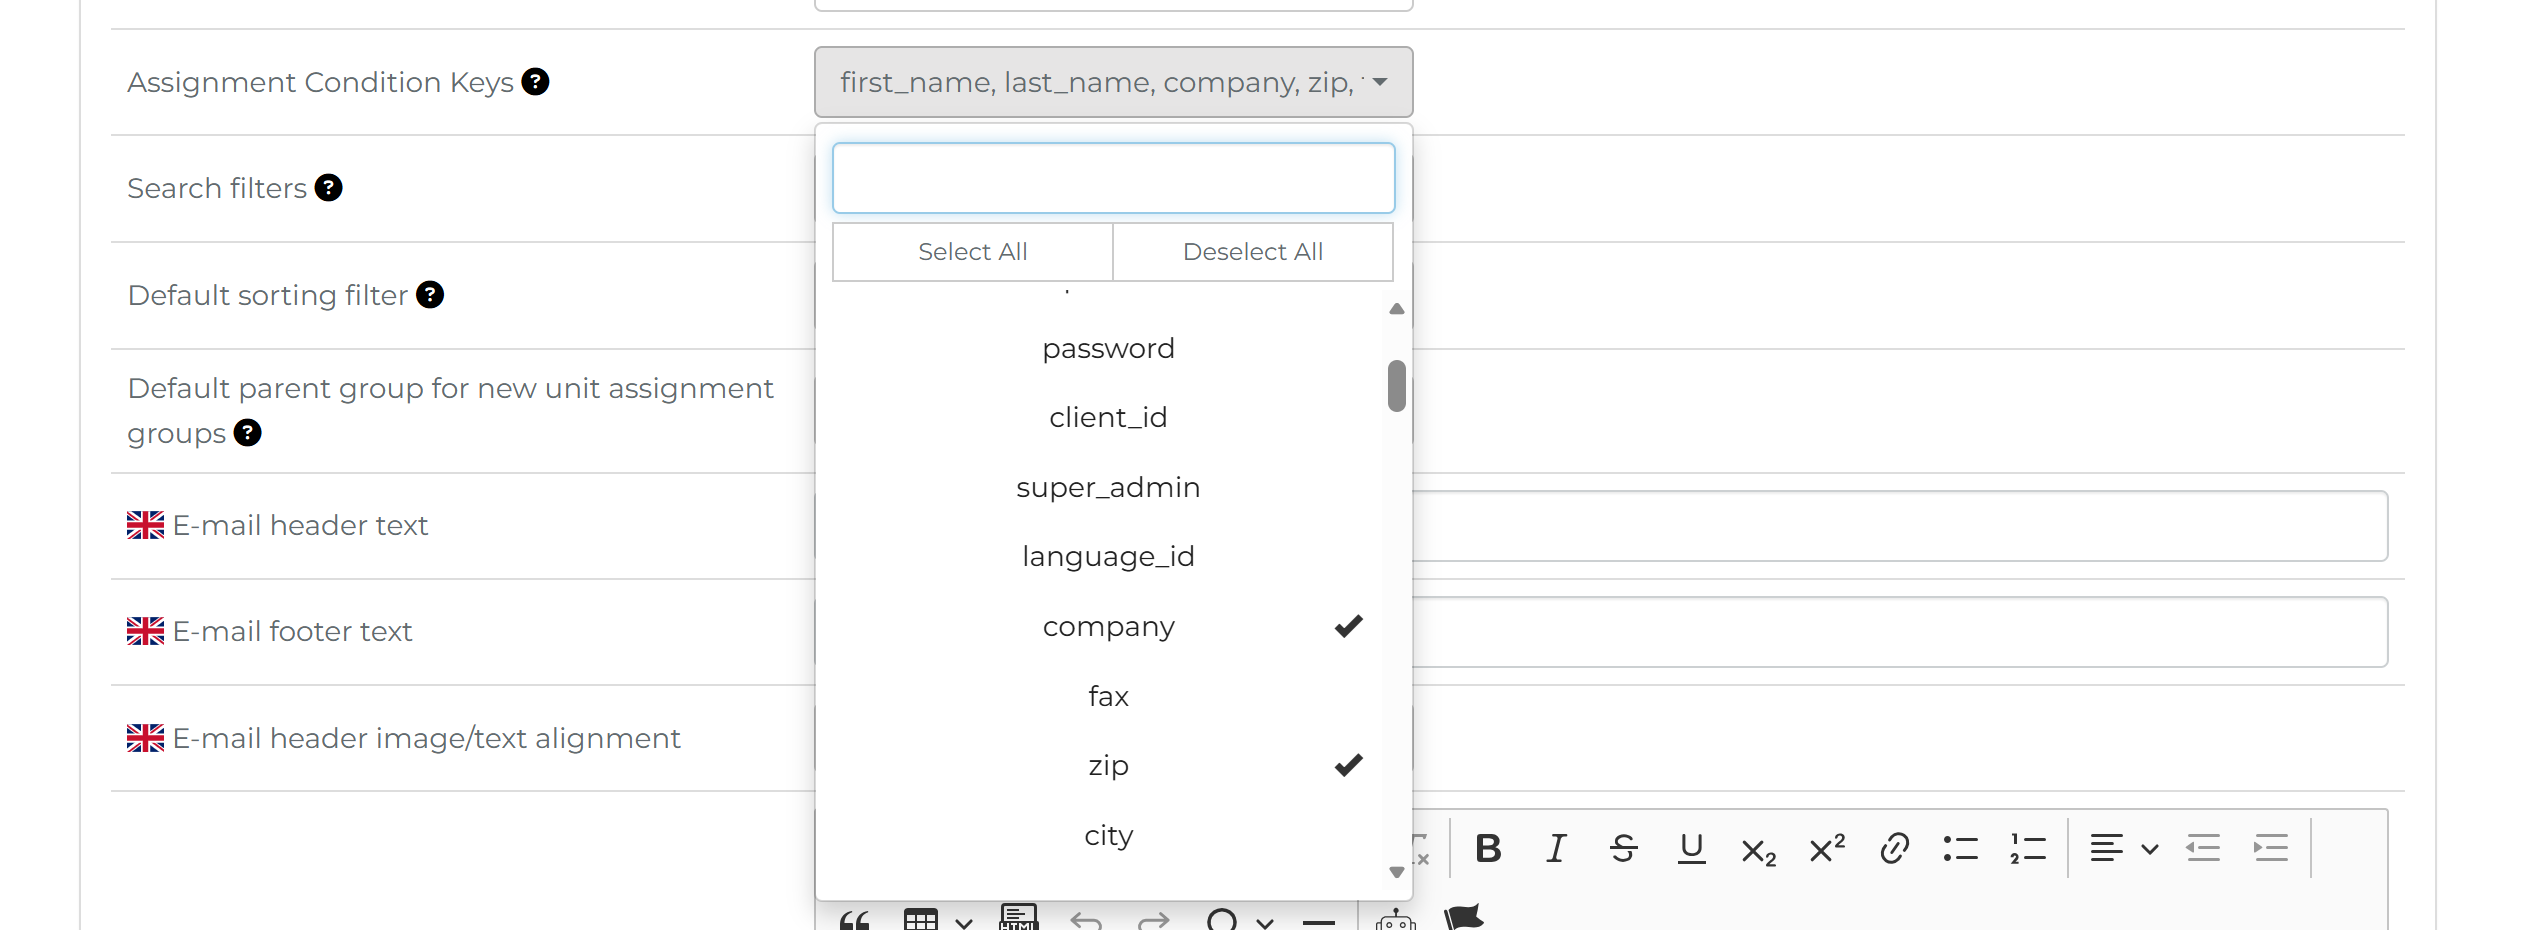
are visible when creating an assignment condition:
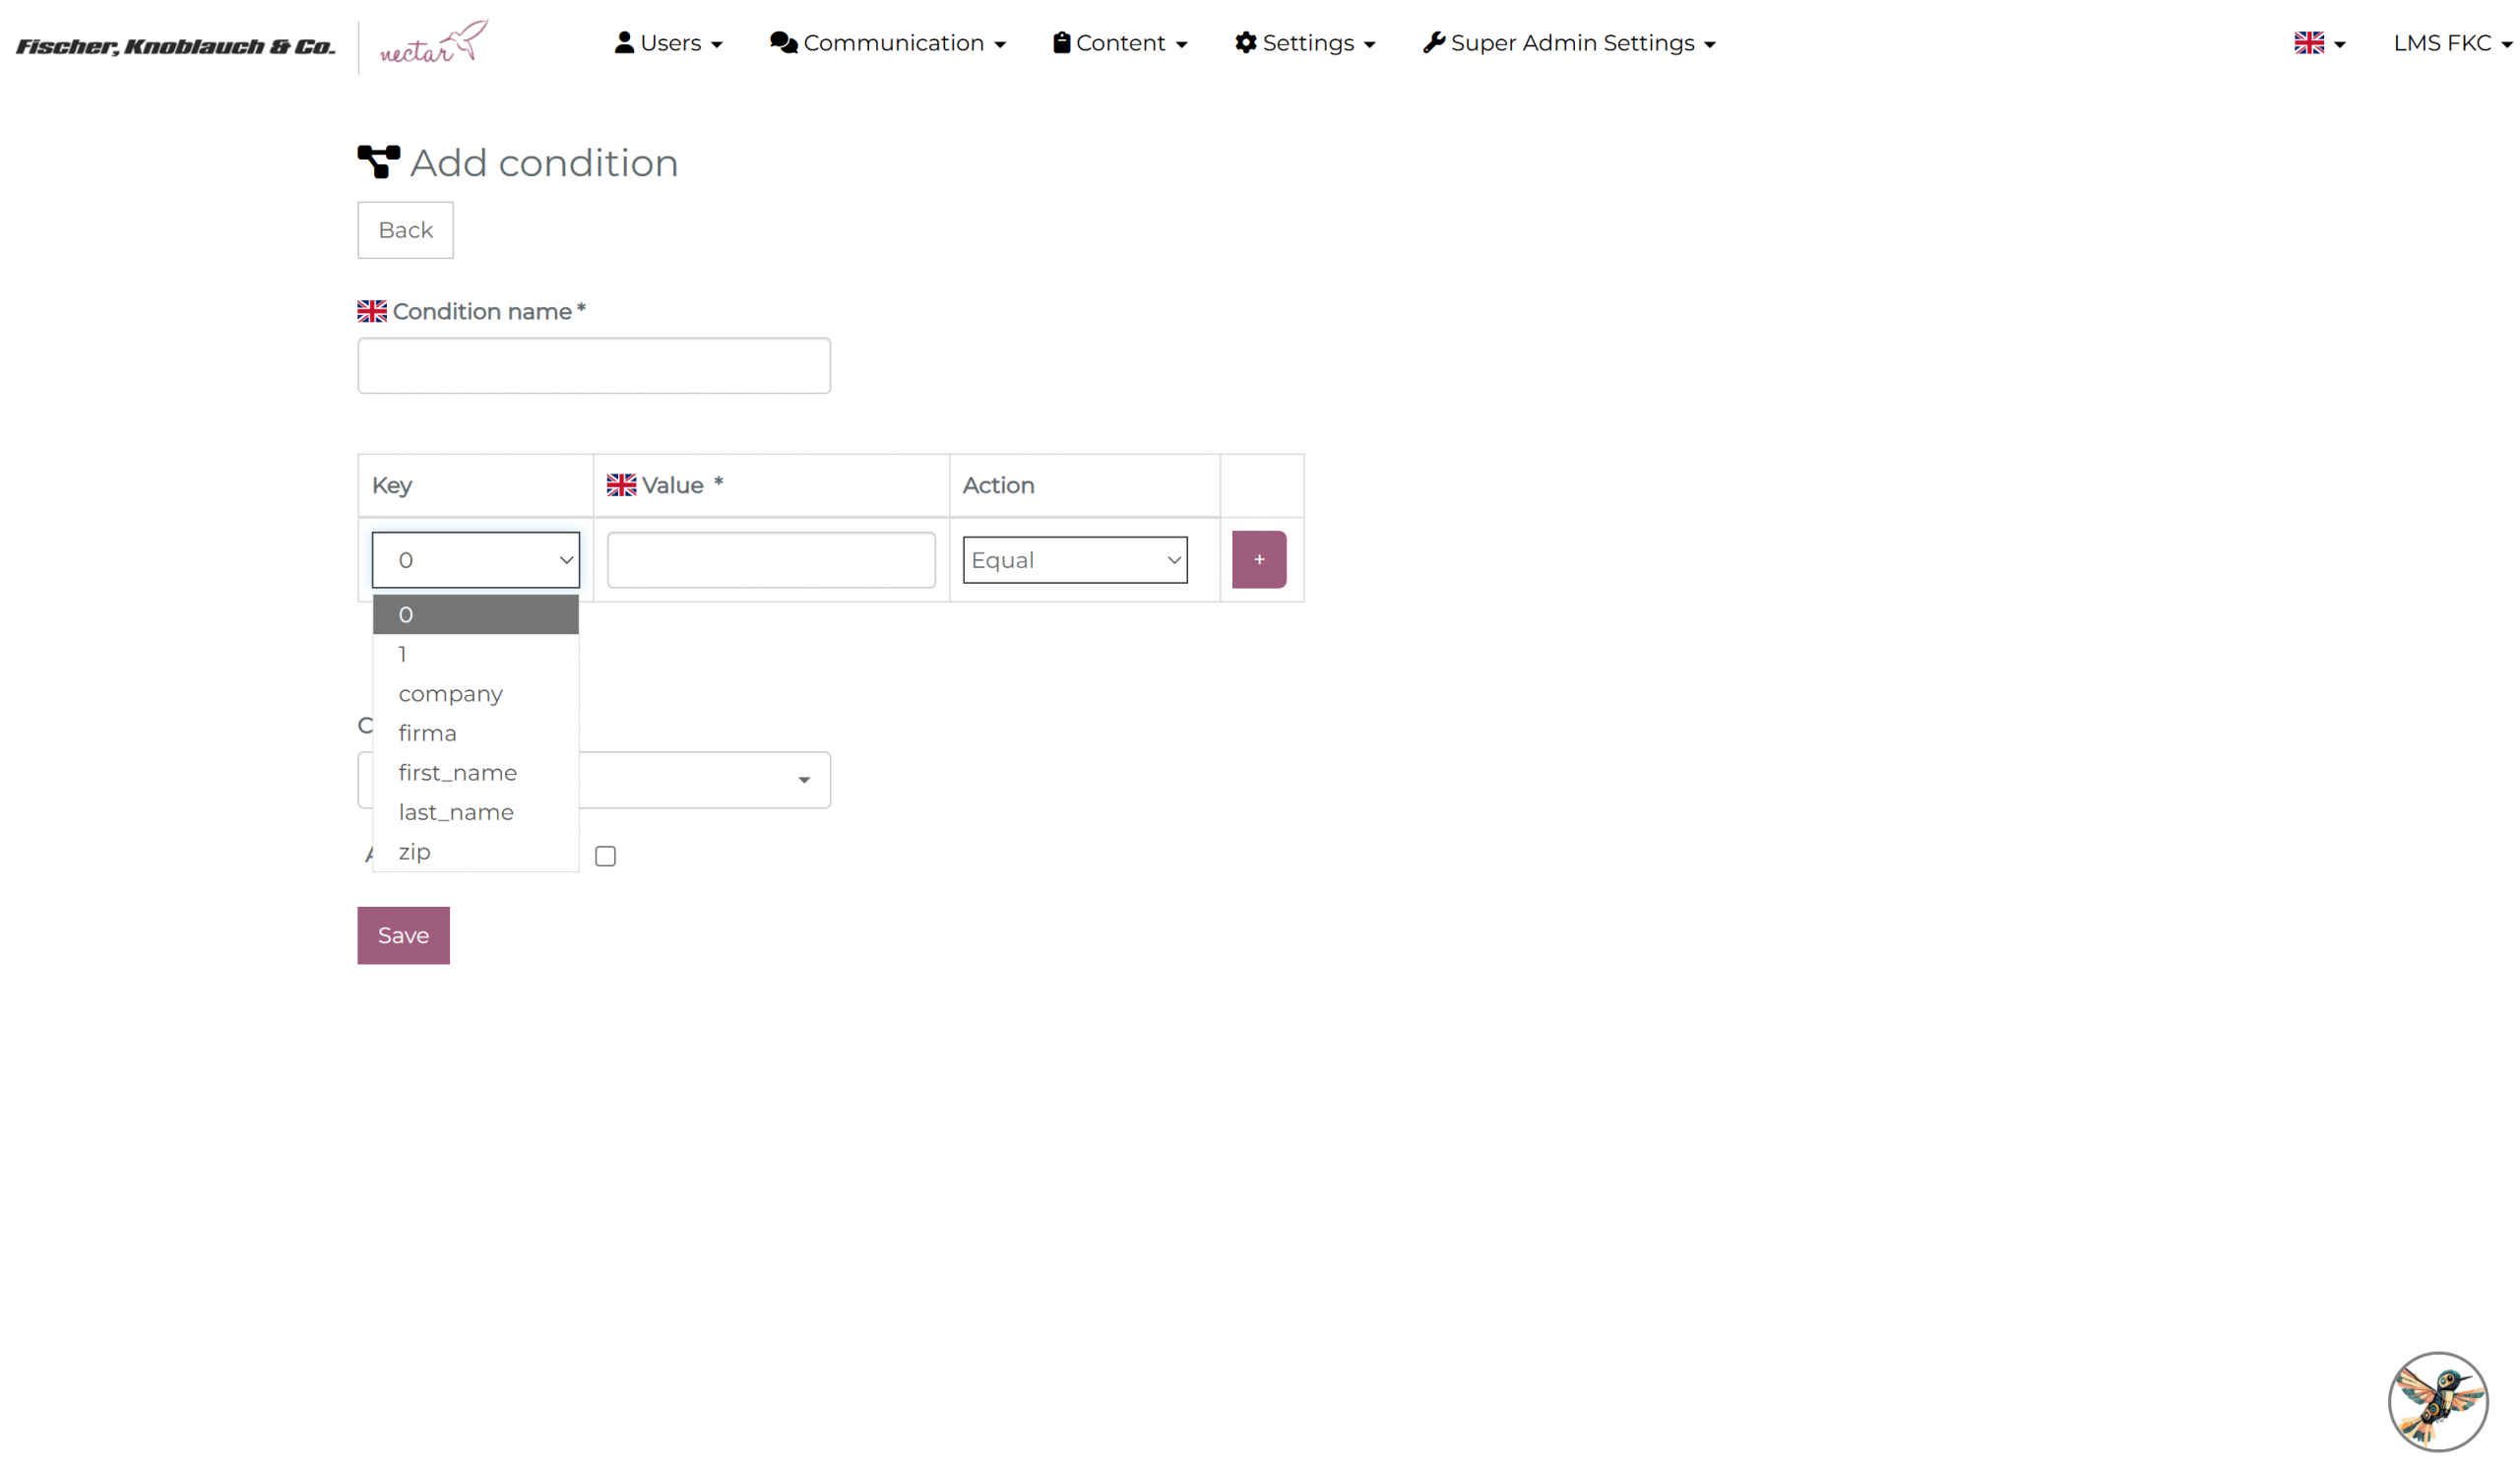
Further information on creating allocation conditions can be found here.
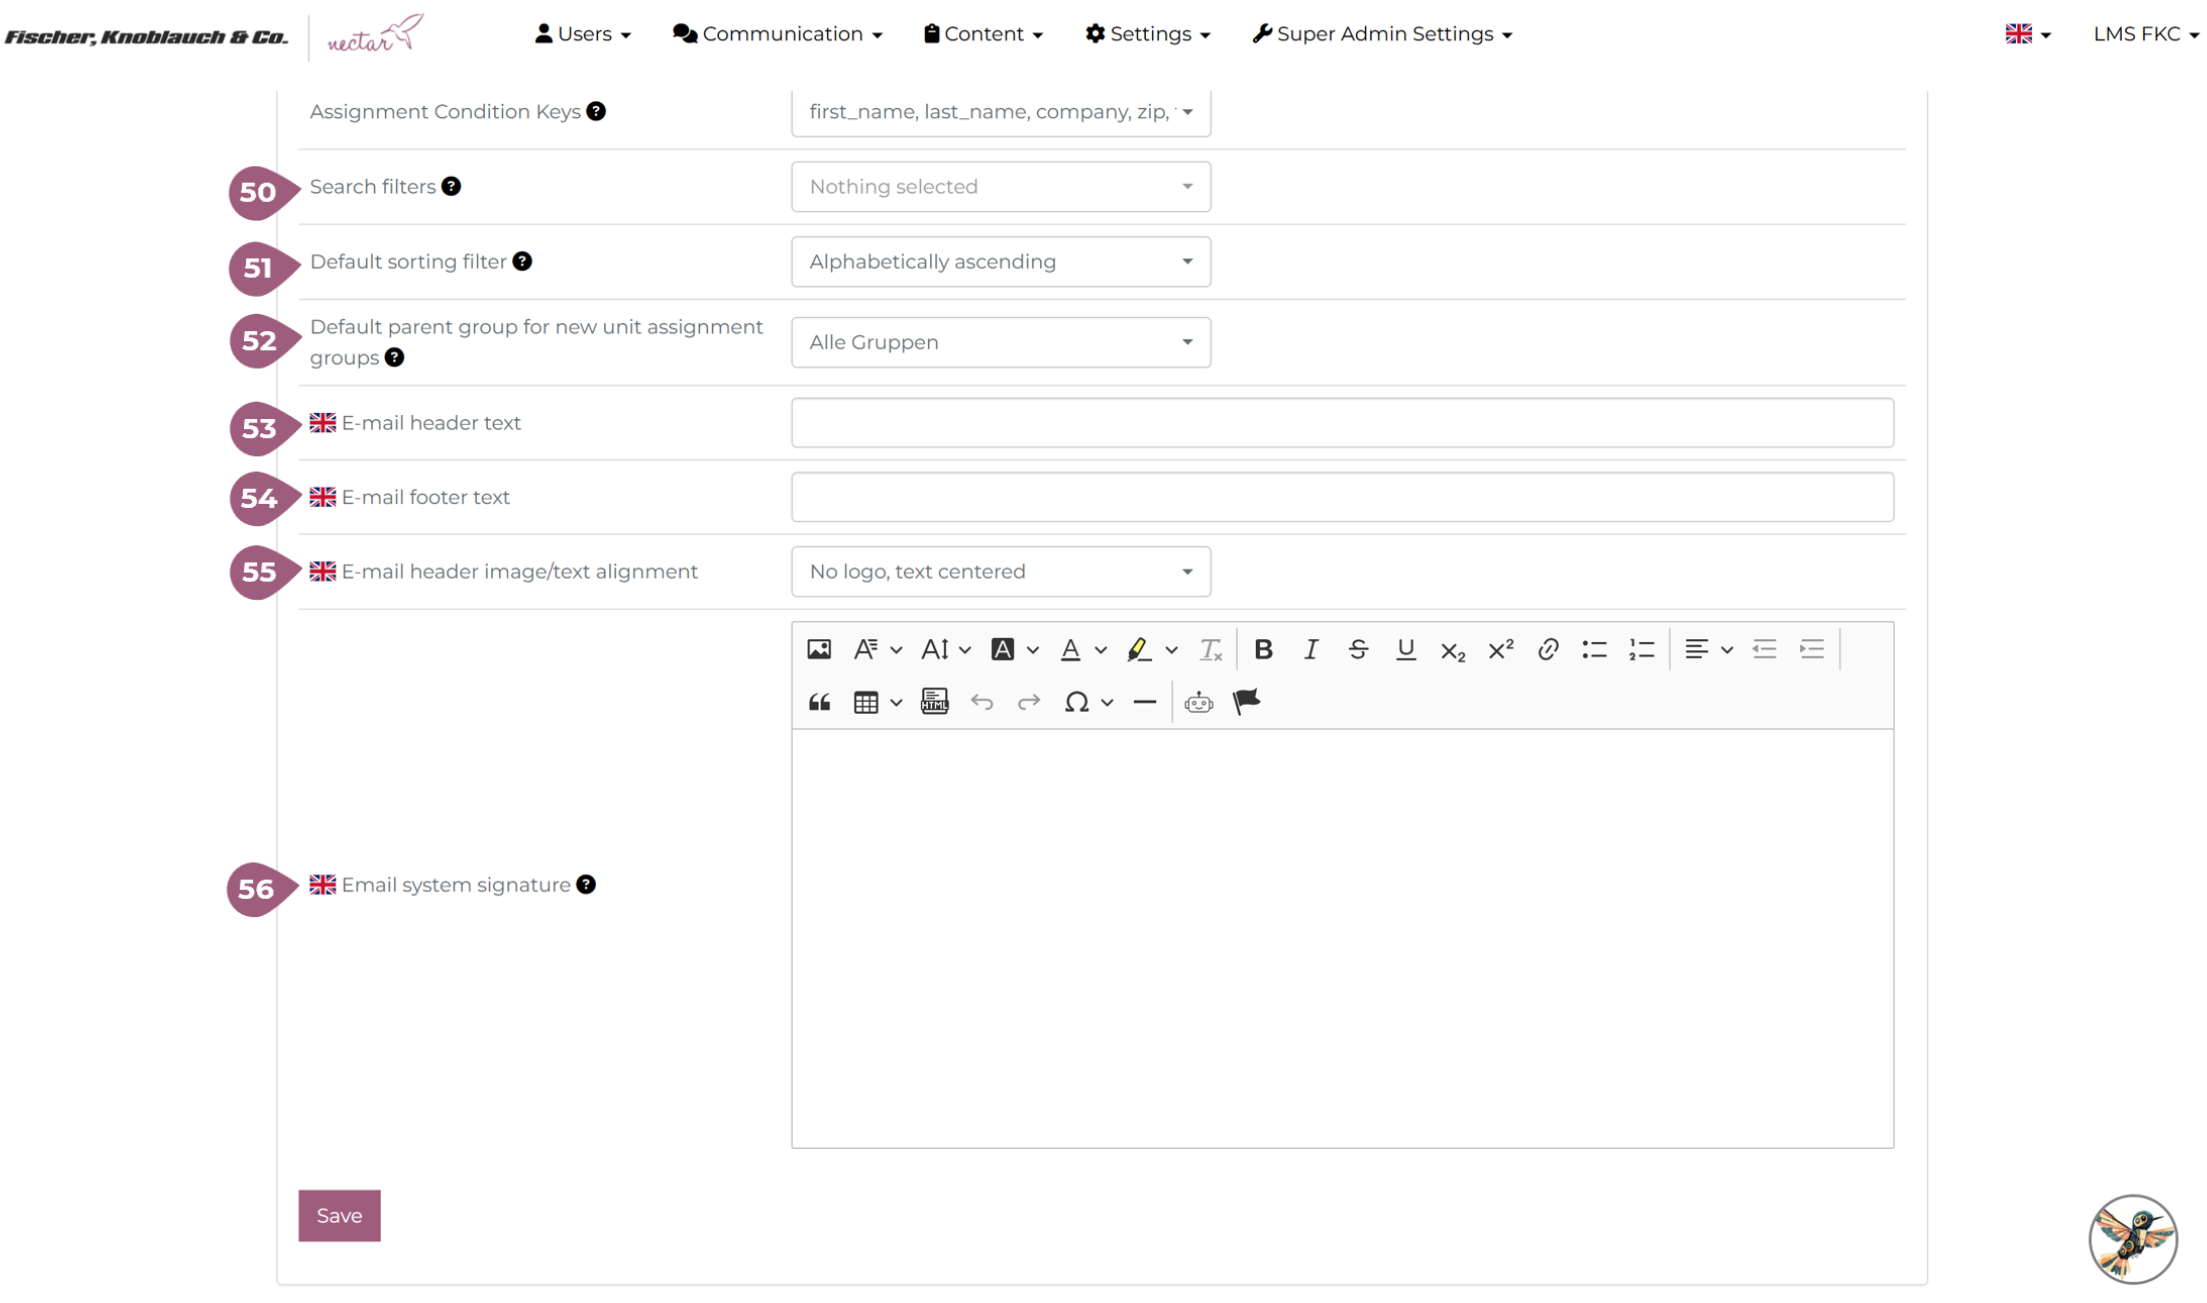
(50) Search filters: Administrators or super administrators can use the “Search filters” setting under Administration > Settings > Configuration > Settings to define which learning elements should be considered by search filters. If none are selected here, the system searches for the search term in all LMS learning units.
(51) Default sorting filter: Administrators or super administrators can use the “Default sort filter” setting under Administration > Settings > Configuration > Settings to define the default sorting filter value in the course overview page.
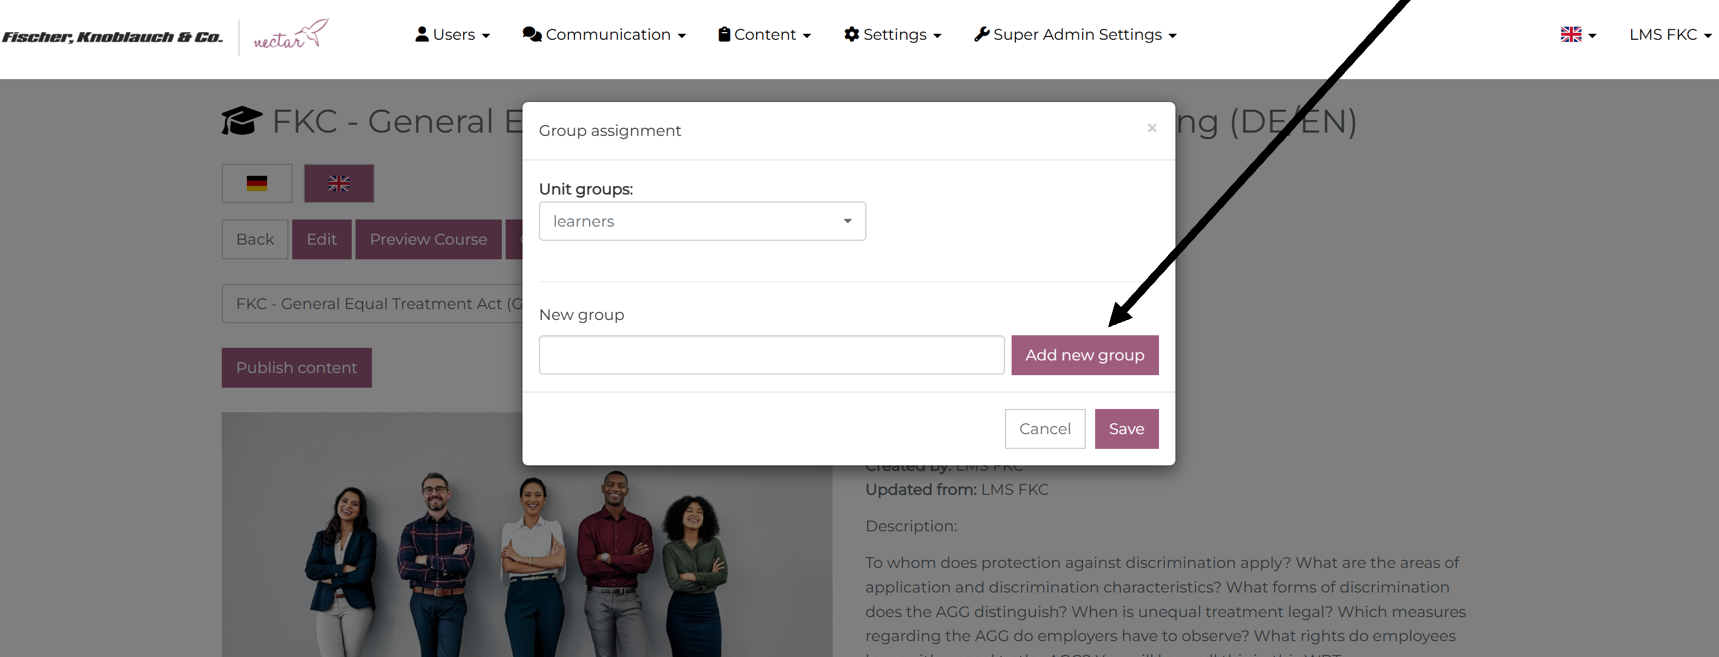
(52) Default parent group for new assignment groups: Administrators or super administrators can use the “Predefined parent group for new assignment groups” setting under Administration > Settings > Configuration > Settings to define the parent group to which newly created groups are assigned when they are created as subgroups via the modal window (see screenshot) for assigning unit groups. This parent group cannot be deleted in the main group view.
(53) Email header text: Administrators or super administrators can customize the header text of the current client’s system emails using the “Email header text” setting under Administration > Settings > Configuration > Settings.
(54) Email footer text: Administrators or super administrators can customize the footer text of the current client’s system emails using the “Email footer text” setting under Administration > Settings > Configuration > Settings.
(55) Email header image/text alignment: Administrators or super administrators can customize the arrangement of the images (logo) and text in the email header using the “Email header image/text alignment” setting under Administration > Settings > Configuration > Settings:

(56) Email system signature: Administrators or super administrators can use the “Email System Signature” setting under Administration > Settings > Configuration > Settings to define the email signature that will be attached to all system emails for the current client.
For further questions, please contact nectar-support@fkc-online.com.