Sending Bulk Emails
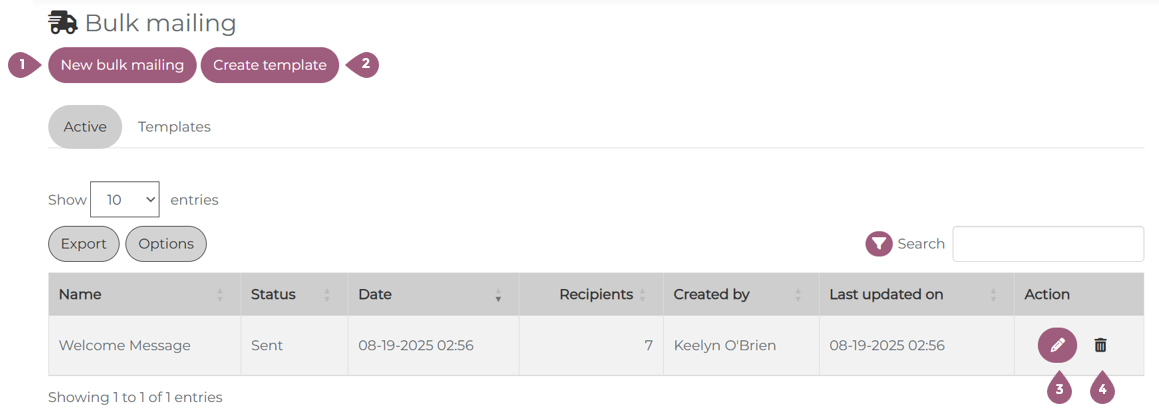
Under Administration > Communication > Bulk mailing, messages can be sent to multiple learners at the same time. The page opens on the Bulk Mailing Overview. Here, you can create new mails (1), create new template for mails (2), edit existing mails (3), or delete mails (4).
Creating a new mail
After clicking on “New mass mailing” (1), the following screen opens.
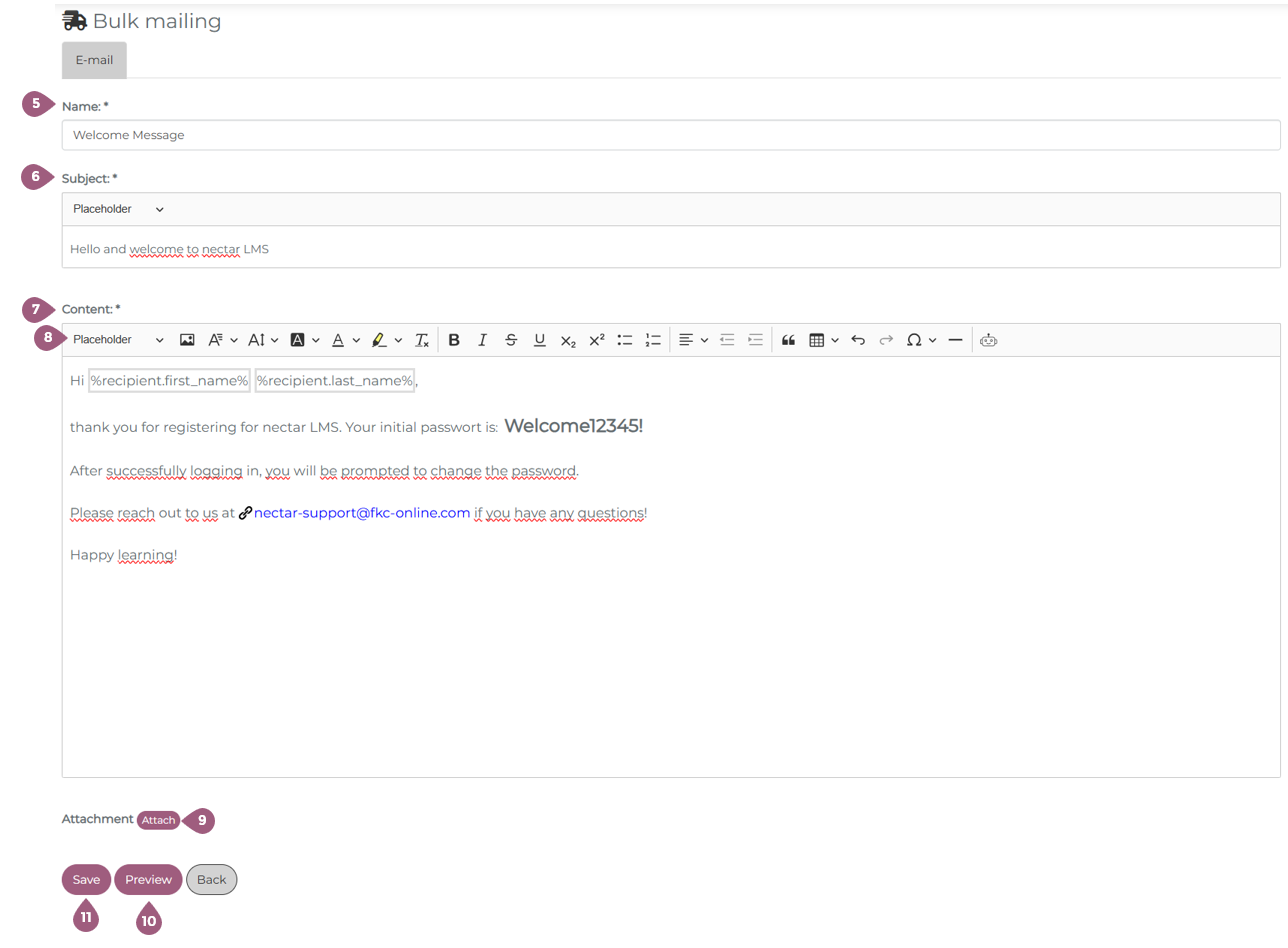
Here, you must first give the mass mailing a name (5) under which it is to be saved, enter a subject (6) for the mass mailing, and enter your message (7). You also have the option of using placeholders (8) in both the subject and the message. This makes it easy to personalize the mass mailing for each learner, for example, by using a personal salutation.
You can then add an attachment (9), preview (10) the mass mailing, or save the information you have entered so far (11). If you click on Back, you can cancel the process.
Add, change, and remove attachments
Clicking on “Attach” (9) opens a pop-up window in which you can select the attachment. You can then save the attachment. You can only add attachments that you have previously added to the media pool. By clicking on “Attach” (10) again, you can change the attachment. If you want to remove the attachment again, you can click on “Remove attachment.”
Don’t forget to save the mass mailing after making any changes, otherwise the changes will not be applied!
Add recipients
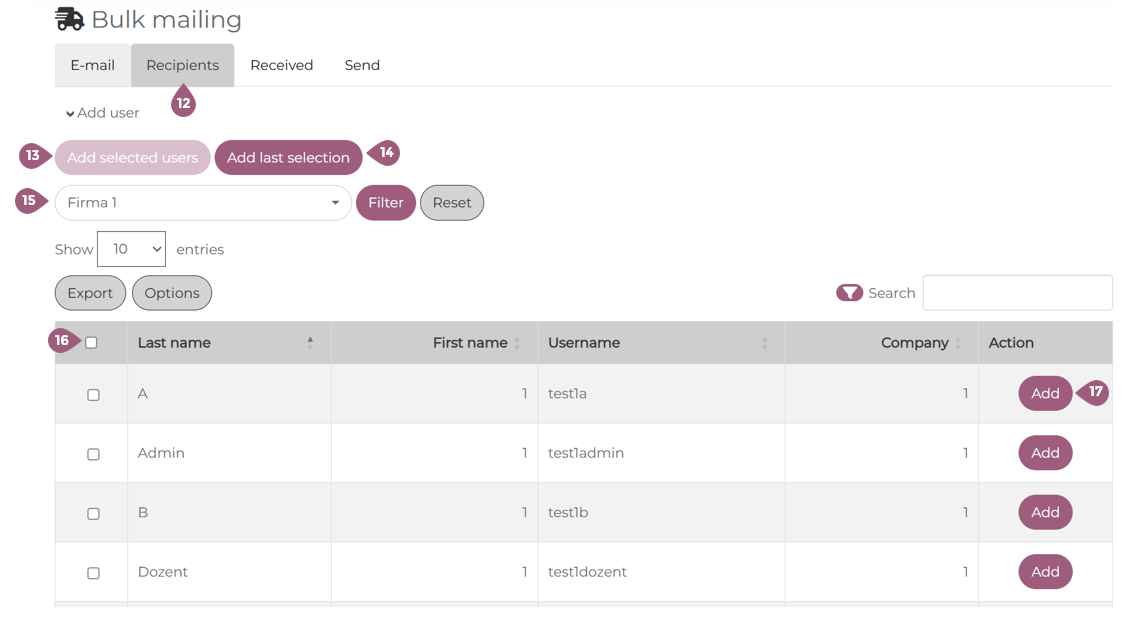
After the mass mailing has been created and saved, the following selection fields appear next to E-Mail: Recipients, Received, and Send. To add a recipients, navigate to the Recipeints tab (12). Here it is possible to select and add users as you would for other functions under “Add users” (17). Learners can either be added individually under the Action > Add column (16), or they can be selected using the selection to the left of their last name and then added using the “Add selected users” button (13).
There is also the option to filter by one or more groups if a mass mailing is only to be sent to specific groups (15).
If you want to remove learners from the recipient list, you can remove them individually via Action > Remove or select them via the selection to the left of the last name and then click on the “Remove selected users” button.
You also have the option to add/remove the last selection (14).
Adding learners retroactively
If the mass mailing has not yet been sent, you can simply follow the steps described in “Adding recipients,” add additional learners, and then send the mass mailing.
If the mass mailing has already been sent, you can still add additional learners as described in “Adding recipients.” However, please note the following:
- Do not remove learners from the recipient list (“assigned users”), as their progress (read in the LMS and, if applicable, attachment opened) can no longer be checked in the “Received” list.
- The learners will not receive the message a second time, even if the box “Send to X users” shows the number of users who have already received the message plus the number of newly selected users.
- Furthermore, the message should not be changed, as otherwise the newly selected learners will receive a different message than the learners to whom the message was first sent.
Send mass mailing
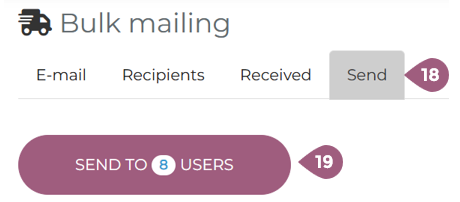
Once you have finished creating the mass mailing and added all recipients, you can send it by going to the tab Send (18) and clicking on “Send to X users” (19). The number in the white circle changes depending on how many learners have been selected.
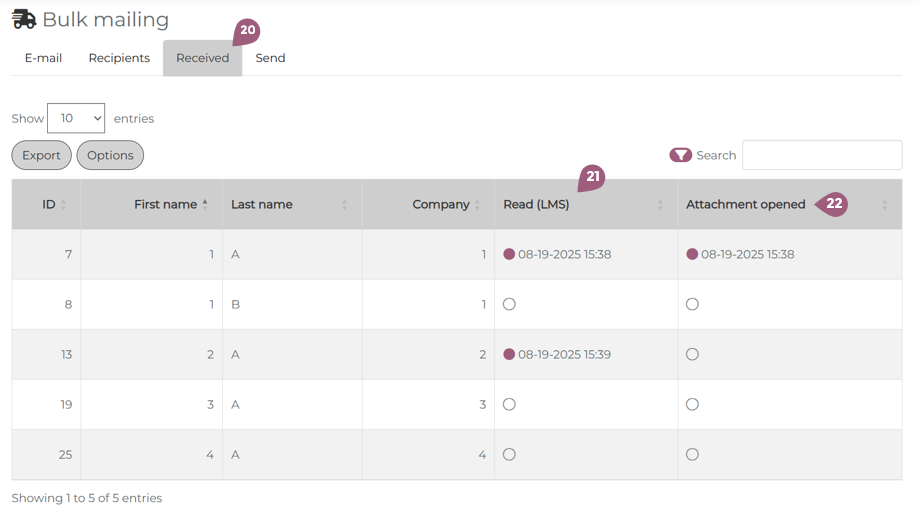
Received messages
The “Received” selection field (20) shows you a detailed overview of which learners you sent the mass mailing to. You can also see when the message was read by the learners in the LMS (21) and, if applicable, when the attachment was opened (22).
User responses
When learners respond to the mass mailing, you will find these messages in your own mailbox. The messages are not displayed in the administration area of the mass mailing.
Templates
As with sending normal messages, you can also create templates for mass mailings and use them for future mass mailings.