Seminar Overview
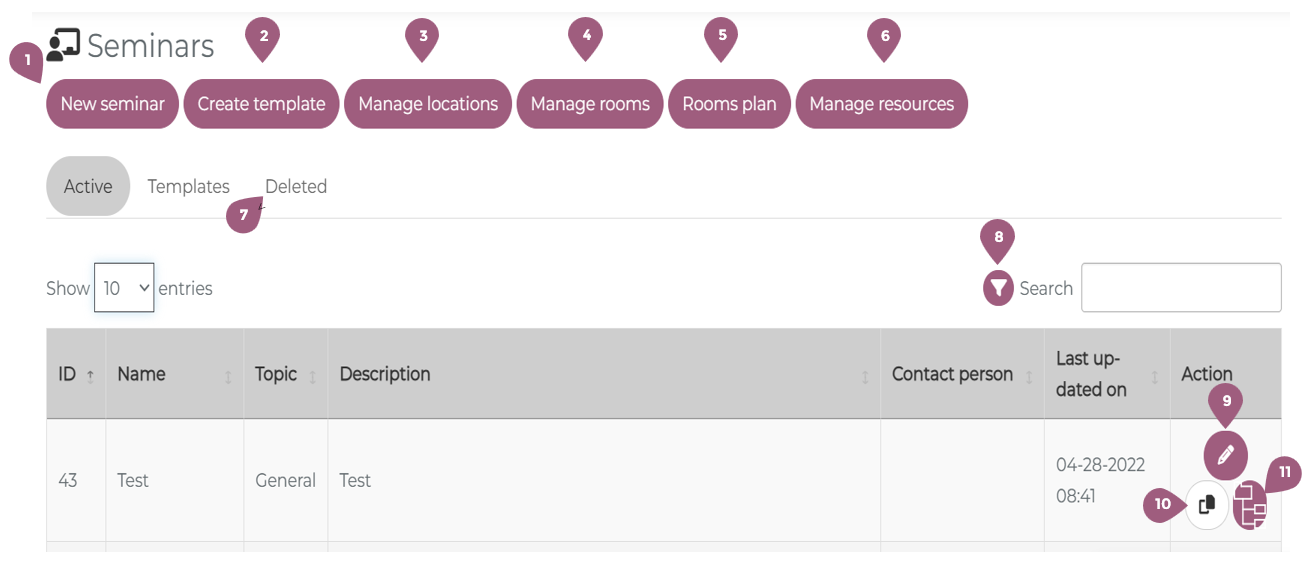
In the seminar overview, you can see all existing seminars and their corresponding data: seminar-ID, name, topic category, description, contact person, and date of last update. The data can be sorted by column by clicking on the header row.
The following options are available to you:
- Using the “New seminar” button, you can create a new seminar.
- Using the “Create template” button, you can create seminars that are not yet activated. (See more at: Create templates – coming soon!)
- Using the button “Manage locations,” you can input the locations at which the seminar takes place. (See more at: Manage locations – coming soon!)
- Using the button “Manage room,” you can input the rooms in which the seminar takes places. (See more at: Manage room – coming soon!)
- Using the button “Rooms plan,” you can open a calendar that shows which meetings take place in which rooms each day. (See more at: Create templates – coming soon!)
- Using the button “Manage resources,” you can input the resources that you would like to use in the seminar. (See more at: Create templates – coming soon!)
- In the tab “Deleted,” you can see seminars that have been deleted.
- Using the search function (8), you can filter the seminar list.
- Using the edit symbol (9), you can see the seminar overview for this particular seminar. There, you can make additional edits to the individual meetings and the seminar. (more information below).
- Using the copy symbol (10), you can duplicate a seminar. Note: when copying a seminar the participants are not duplicated. They will have to be manually added later.
- Using the Assignments symbol (11), you can see to which users, groups, lernboxes, or curriculum this seminar has been assigned.
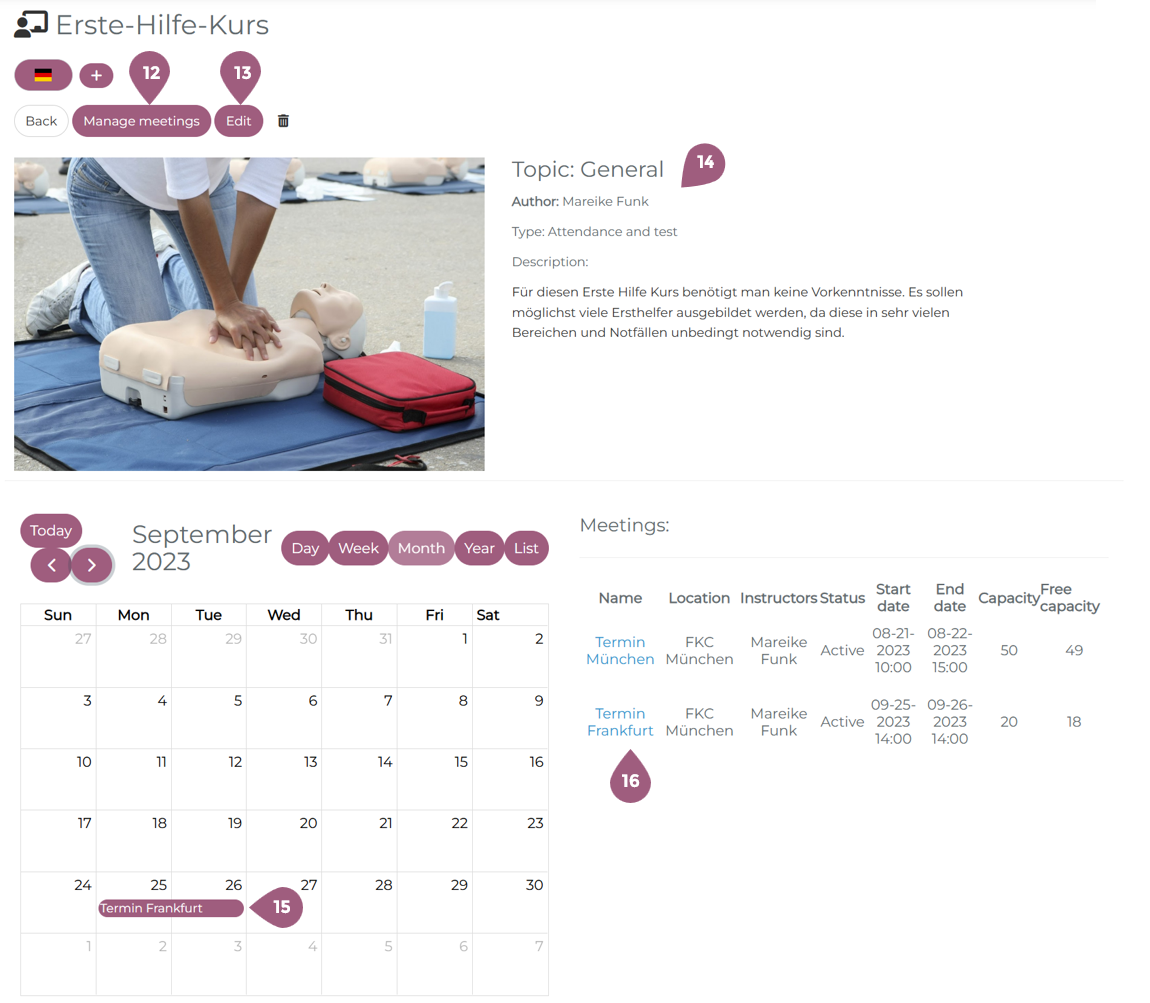
If you click on the edit symbol (9), you will be taken to the overview of the selected seminar. When you click on the flag symbol, you will have the ability to change which language(s) the seminar is available in. You can add more languages with the + symbol. In order to delete a language, the seminar cannot be assigned to other groups. After you have removed the assigned groups from the seminar, it will again be possible to remove the language.
If you click on “Manage meetings (12),” you can edit the individual meetings. (More information below).
When you want to update or change the seminar and it’s settings, you can do so with the “Edit (13)” button. Using the paper basket symbol, you can delete the entire seminar. The seminar overview also includes information about the seminar (14), a visualization of the meetings in the calendar (15), and the meetings (16).
If you click on one of the meetings, you can manage the participants. For more on participant managment see: Participant Managment
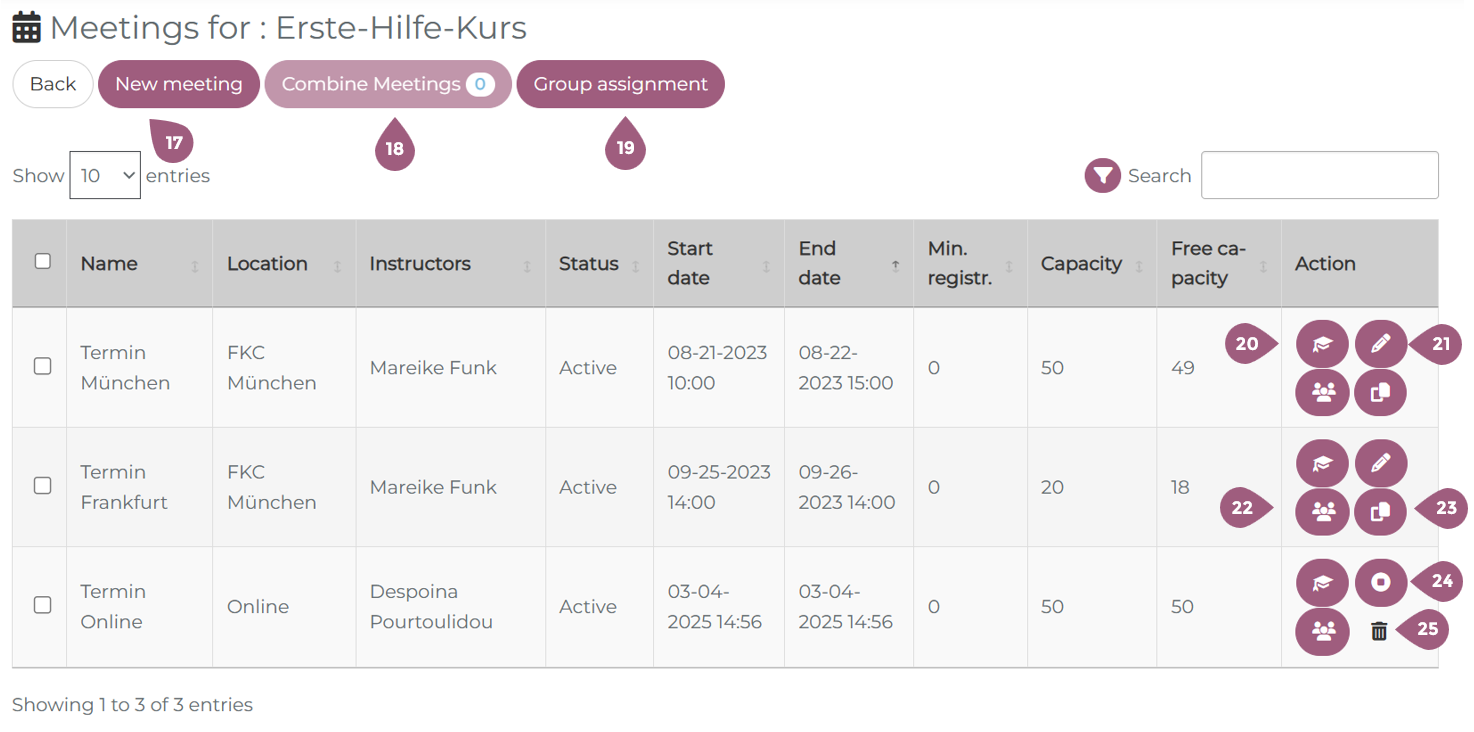
When you click on “Manage meetings,” you will be taken to an overview of all meetings included in this seminar. Here, it is possible to view and edit information related to a meeting, including: name, location, instructor, status, start date, end date, minimum registration number, total capacity, and free capacity.
There are several options to create, manage, and assign meetings. They are:
- the “New meeting” (17) button allows you to create new meetings. (see: Create Meetings – coming soon!)
- the “Combine meetings” (18) button allows you to link meetings together. Note: the meeting capacity must be the same.
- the “Group assignment” (19) button, which allows you to assign the meetings to a specific group of participants
In the last column, there are a few additional options available to manage individual meetings. They are:
- the graduation cap symbol (20) which allows you to see which groups the meeting is attached to. When applicable, you can also see which groups have reserved spots and how many have already been taken.
- the edit symbol (21) which allows you to edit individual attributes of the meeting
- the groups symbol (22) which allows you to manage the particpants of the meeting (see: Participant managment)
- the copy symbol (23) which allows you to copy the meeting. Note: You will need to add a new start and end date as well as assign the participants
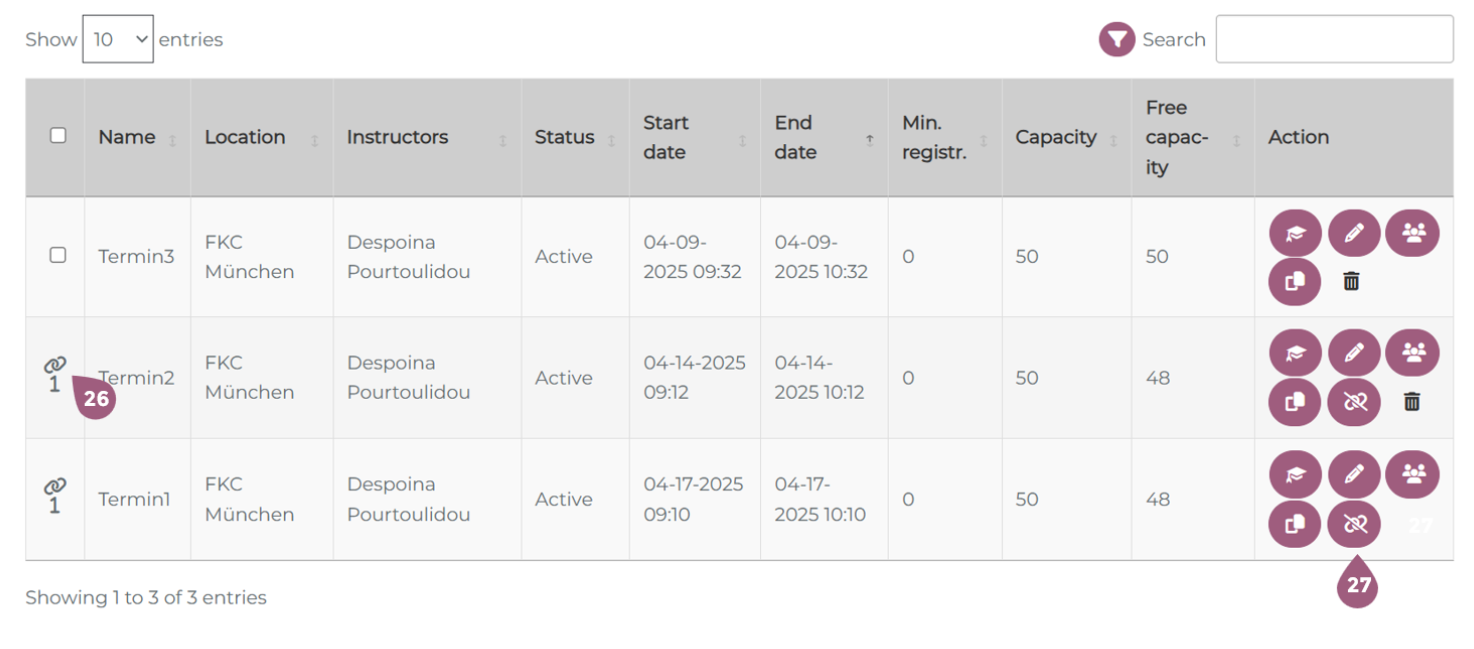
- The stop symbol (24) indicates a series meeting. When creating a meeting, you can check the box “Meeting series” and determine how frequently this meeting repeats. (See: Creating a meeting – coming soon!). After being saved, a meeting series is no longer able to be edited or duplicated. When you want to end the series, you will need to click on the stop symbol.
- the trash can symbol (25) is used to delete a meeting. Note: meetings can only be deleted when there are no participants assigned.
Combined meetings are displayed using the link symbol (26). When you want to seperate the combined meetings, you can click on the link symbol that is crossed out (27).