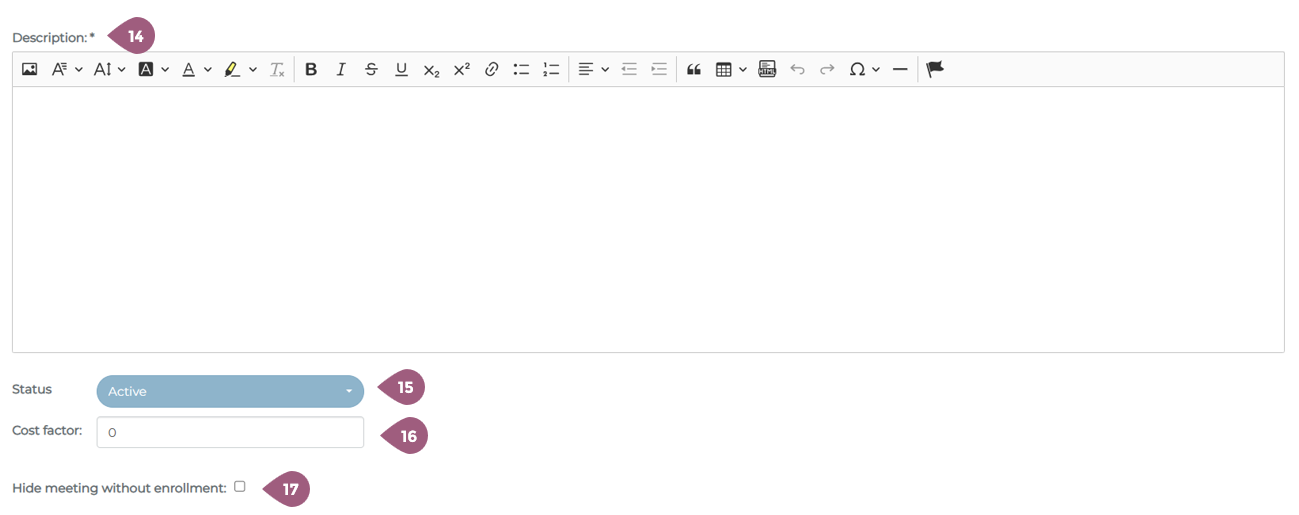
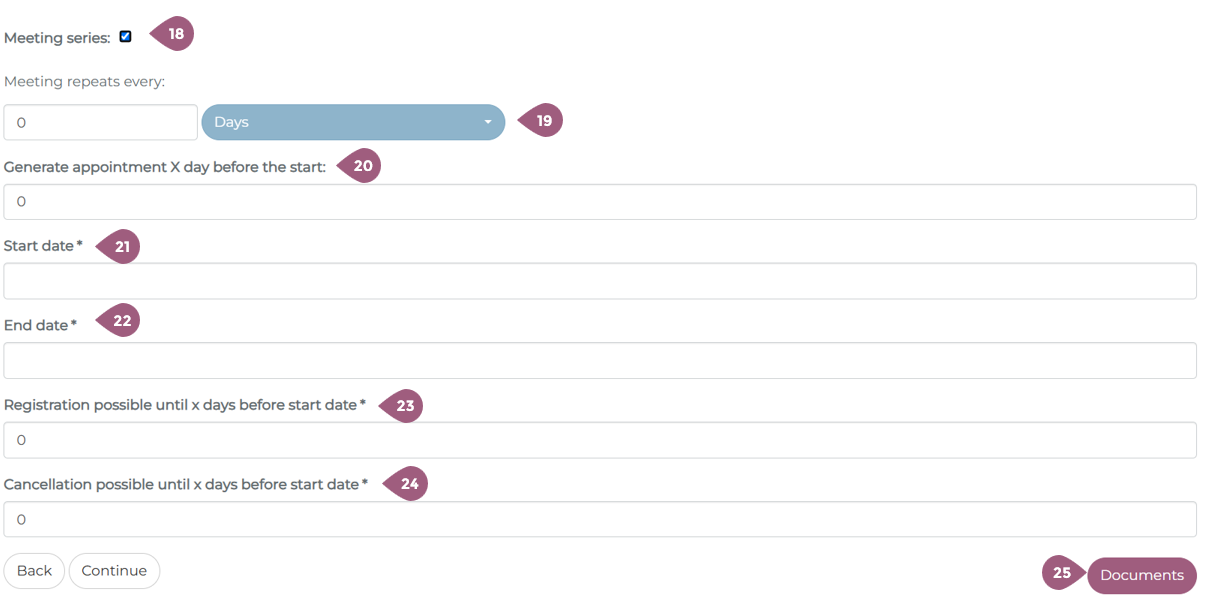
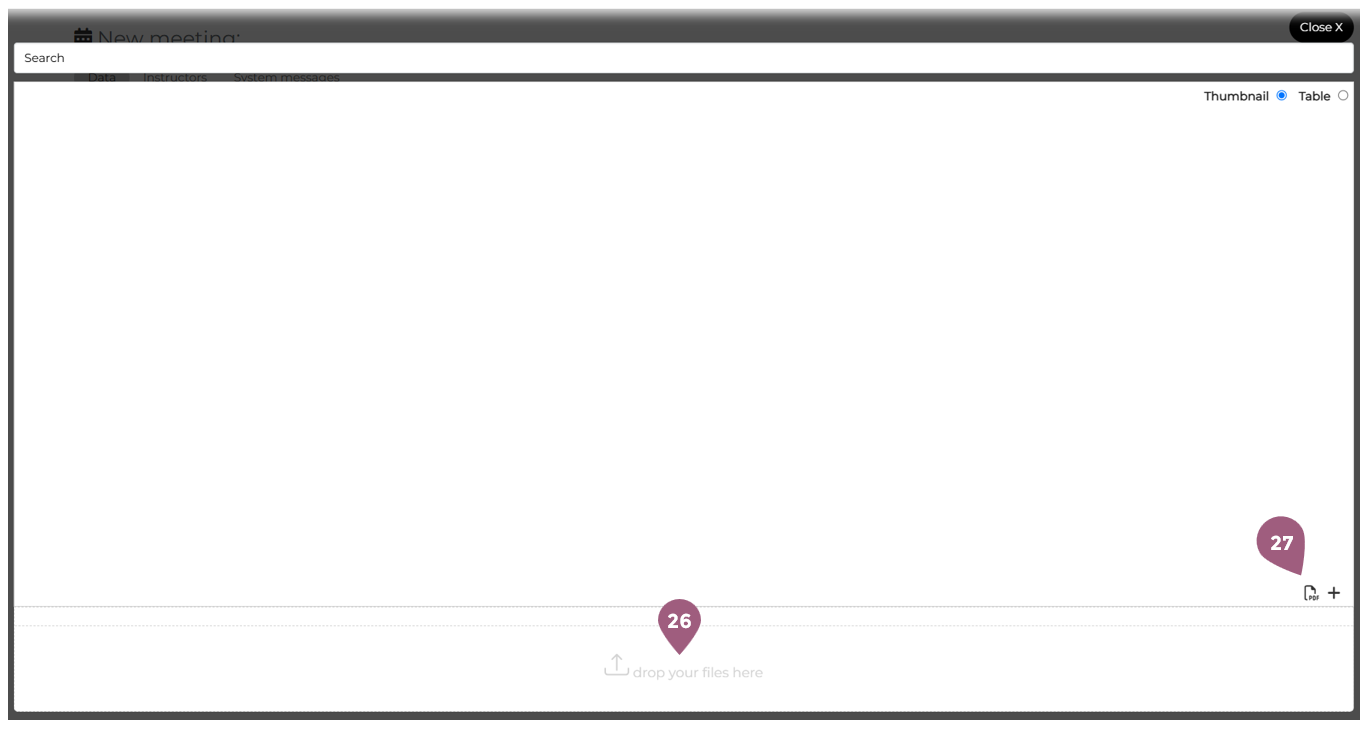
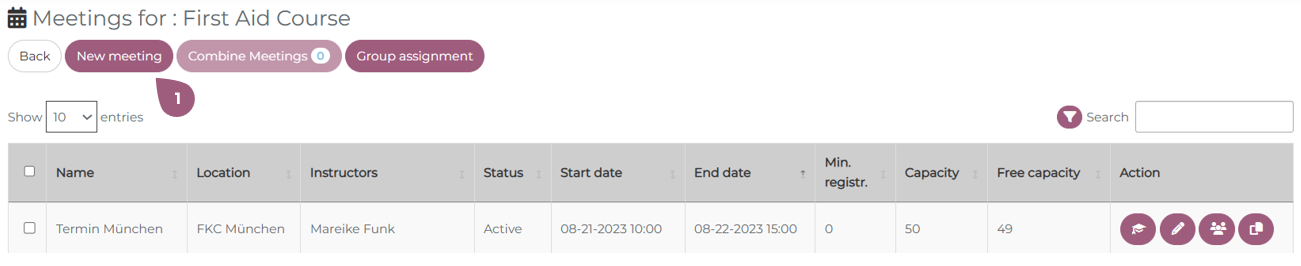
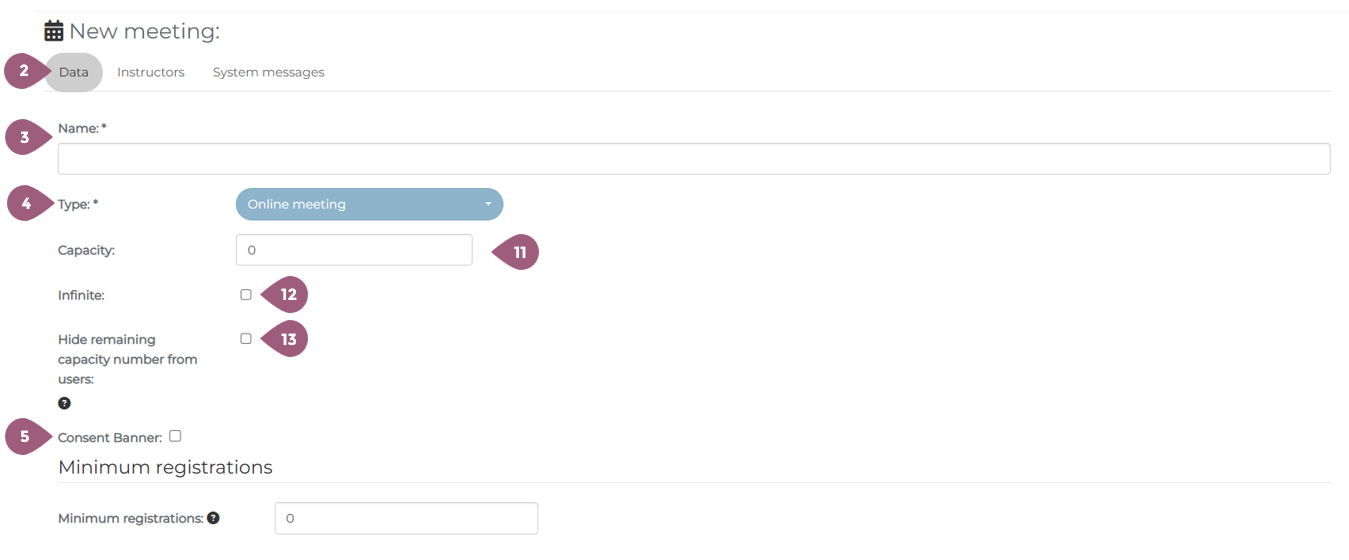
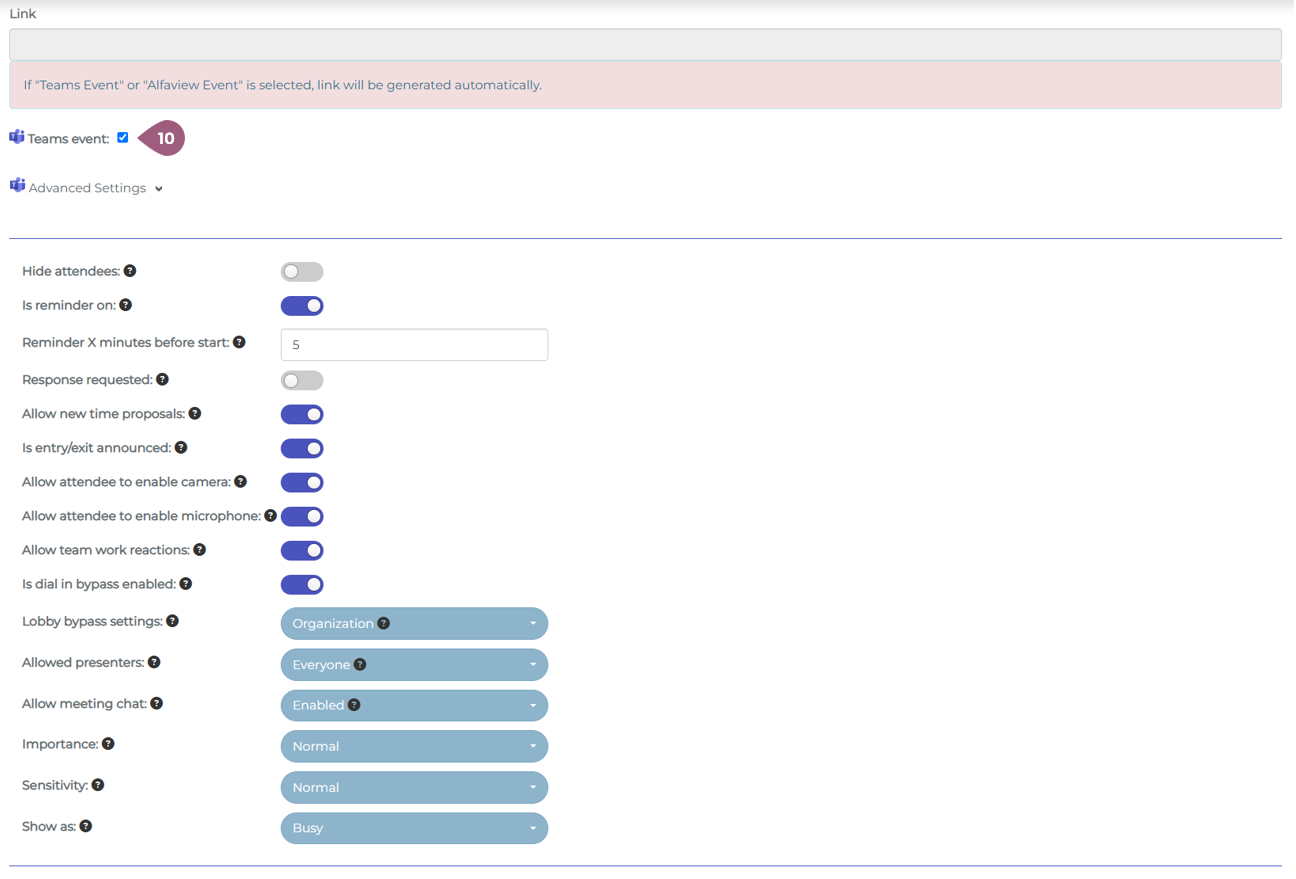
After you have entered the general information and configured the settings for a seminar, you will be asked to create a meeting. In order to create a new meeting, you must go to Adminsitration > Content > Seminars > “Manage Meetings.” There you will see the button “New Meeting.” (1). Note: If a seminar does not contain any meetings, it will not be visible or able to be assigned to any groups. To create a meeting, you must begin in the tab “Data” (2). The name (3) of the meeting and the type (4) of meeting must be selected. Using the drop-down menu, meetings can be designated as either physical or online. Optionally, a consent banner (5) can be activated that the participants must acknowledge before enrolling in the seminar. This can be used for cookies, disclaimers, etc. It is also possible to designate a minimum registration number (6). If this number is not reached within the specified timeframe, it is possible to inform the meeting creator (7) and/or automatically cancel the meeting (8). These options are only displayed when the minimum participant number is greater than 0. It is also possible to designate the meeting as a Teams event (9). Creating an online meetings is very similar to creating physical meetings, but there are a few extra settings to take into consideration. When under type (4) online meeting is selected, the capacity (11) must be entered. It is also possible to have no capacity limit, in which case “Infinite” (12) needs to be selected. If desired, it is also possible to hide the remaining number of available spots in the meeting from the learners (13). The link for the meeting is automatically generated when the event is hosted on Teams (10). As with physical meetings, it is possible to tailor the meeting settings to your needs. Every meetings requires a brief description (14). Key words, bullet points, or a paragraph can be used to describe what will be discussed. The description will be displayed in the key info section of the meeting (for more see: Seminars: Learner’s View – coming soon!). The status of the meeting (15) is automatically listed as active, but can be changed to planning or cancelled. The setting cost factor currently has no fuction and will be removed in further updates. If you want to learn more about seminar costs, check here: Seminar Cost Statistics – coming soon! Should you choose, it also possible to hide the meeting from participants unless they are enrolled in it (17). With the “Meeting series” setting (18), it is possible to create a repeating meeting. You can set the frequency with which the meeting repeats (19) as well as when the meeting will be created in the system. Participants are automatically enrolled in future meetings. The start date (21) and end date (22) of the meeting are required. You must also specify until when it is possible to register for the meeting (23) or cancel the meeting (24). 0 days means that it is possible up until the start of the meeting. Finally, it also possible to attach documents to the meeting (25). These can be PDFs, Word documents, etc. that you would like to make available to all enrolled participants. The documents can be uploaded using the Drag and Drop function (26). It is also possible to add documents that were already uploaded into the Mediapool (27). Information about the Mediapool and how to upload documents there can be found at: Mediapool – coming soon! Once you are finished adding documents, you can close the window and move on to the next steps. Information about the Tab “Instructors” and how to add instructors per meeting can be found at: Create a meeting: Instructors Information about the Tab “Rooms” and how to add rooms per meeting can be found at: Create a meeting: Rooms Information about the Tab “Resources” and how to add recourses per meeting can be found at: Create a meeting: ResourcesSeminars: Create a Meeting
Data: Physical Meetings

Data: Online Meetings
Finish Setting up a Meeting: Main settings