Creating Courses
Courses are one of the cornerstone elements of nectar LMS. Their creation is very similar to that of other learning elements.
When creating a new course, you will see three tabs across the top: General, Settings, and System Messages.
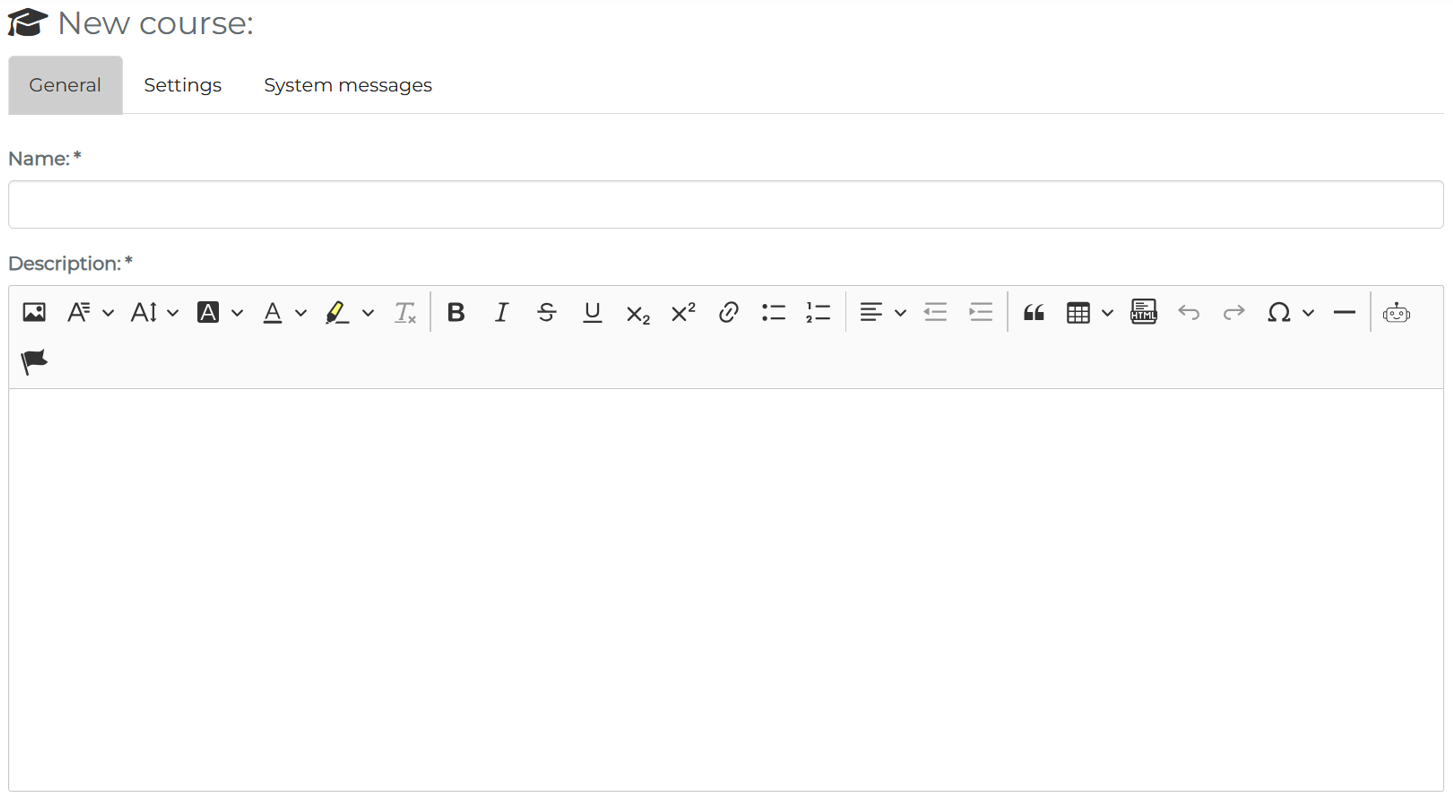
General
In this section, you will need to complete the most basic information about the course. Here, only the name and the description are required fields. For a detailed walkthrough of all the fields in the general tab, please see: Creating a Learning Unit: General Information
Settings
In this section, you will additional settings to tailor this course to your needs. All settings are given a detailed explanation on this page: Creating a Learning Unit: Settings
Courses have one additional setting: Minimum completion time. This setting determines how long (in minutes) a user must have the course open before it can be counted as complete.
System Messages
This tab remains empty until the course has been saved for the first time. Then, the system messages that will be generated from the settings will be visible. Before saving, it is also possible to add a custom system message to this course. More about custom system messages can be found here: Creating a Learning Unit: Custom System Messages
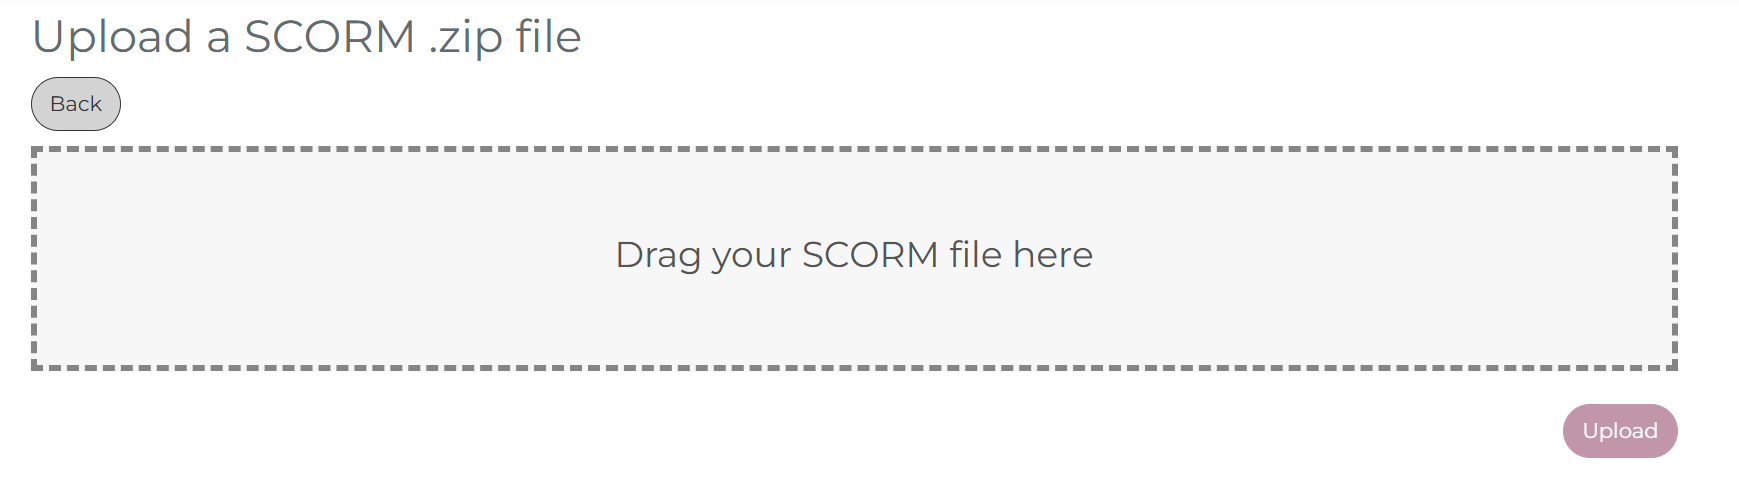
The final step to create a course is to upload a SCORM file.
Before Publishing A Course
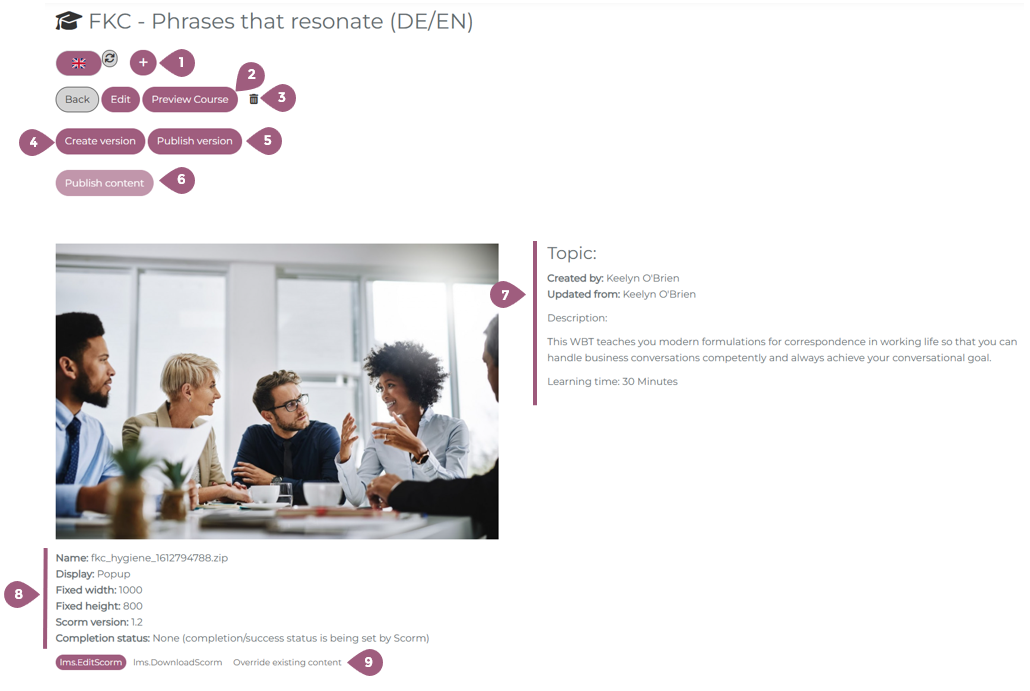
Once this is complete, you will be on the course overview page. Here, you can:
- Add or edit the language of the course
- Preview the course to see how it loads in the LMS
- Delete the course
- Create a version of the course
- Publish the version of the course. Note: The course must be published for it to be assigned to learners.
- Publish content. This is only needed if you intend to create public-facing course content.
- Review key information about the course including Topic, Description, and Content
- View key information relating to the SCORM file
- Edit the SCORM file, overwrite the existing file, or download the SCORM file
Note: SCORM files can only be overridden when the version has not yet been published.
After Publishing A Course
After publishing the course, it is “live” in the LMS. Although it is published, no learners will see the course until it has been assigned to a group or to individual learners.
Note: Courses can only be removed from a group by navigating to the group settings under User > Groups > Courses.
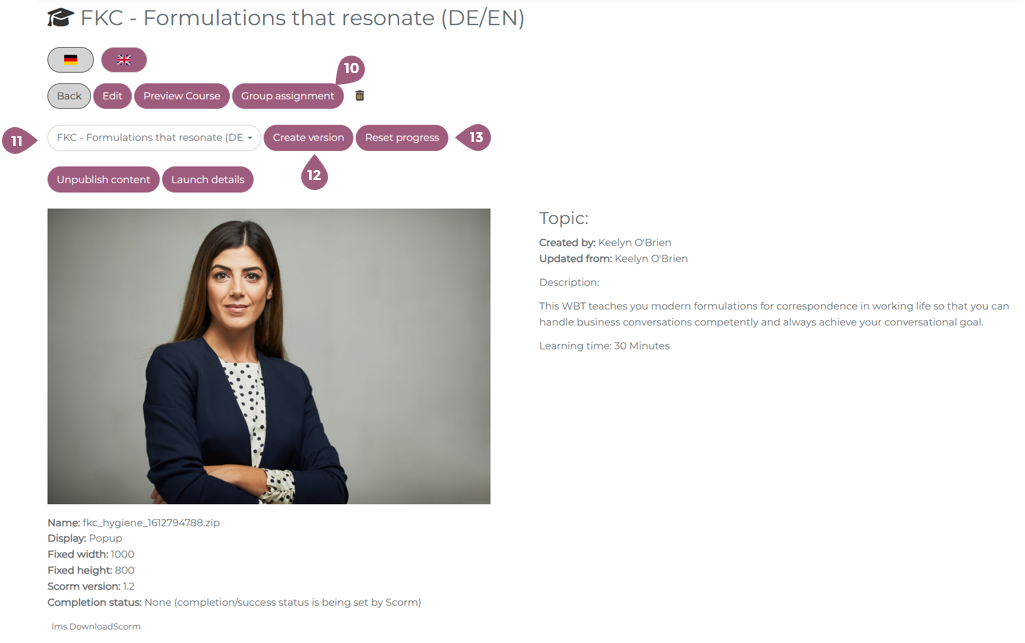
The course can either be assigned under Users > Groups or using the Group assignment button (10). When a new version of the course has been created, it is possible to view previous versions and their settings using the version dropdown menu (11). At any time, it is possible to create a new version of the course (12). When you want to update users who have already made progress on or completed the course, it is necessary to reset their progress (13). Optionally, you can reset the progress for all learners in the LMS or only those who have incomplete courses. All learners who have been assigned the course, but not yet started will have their course automatically updated. All users who are assigned the course for the first time will receive the newest version.
Should you need to revert to a previous course version, it is possible to delete any version of a course.